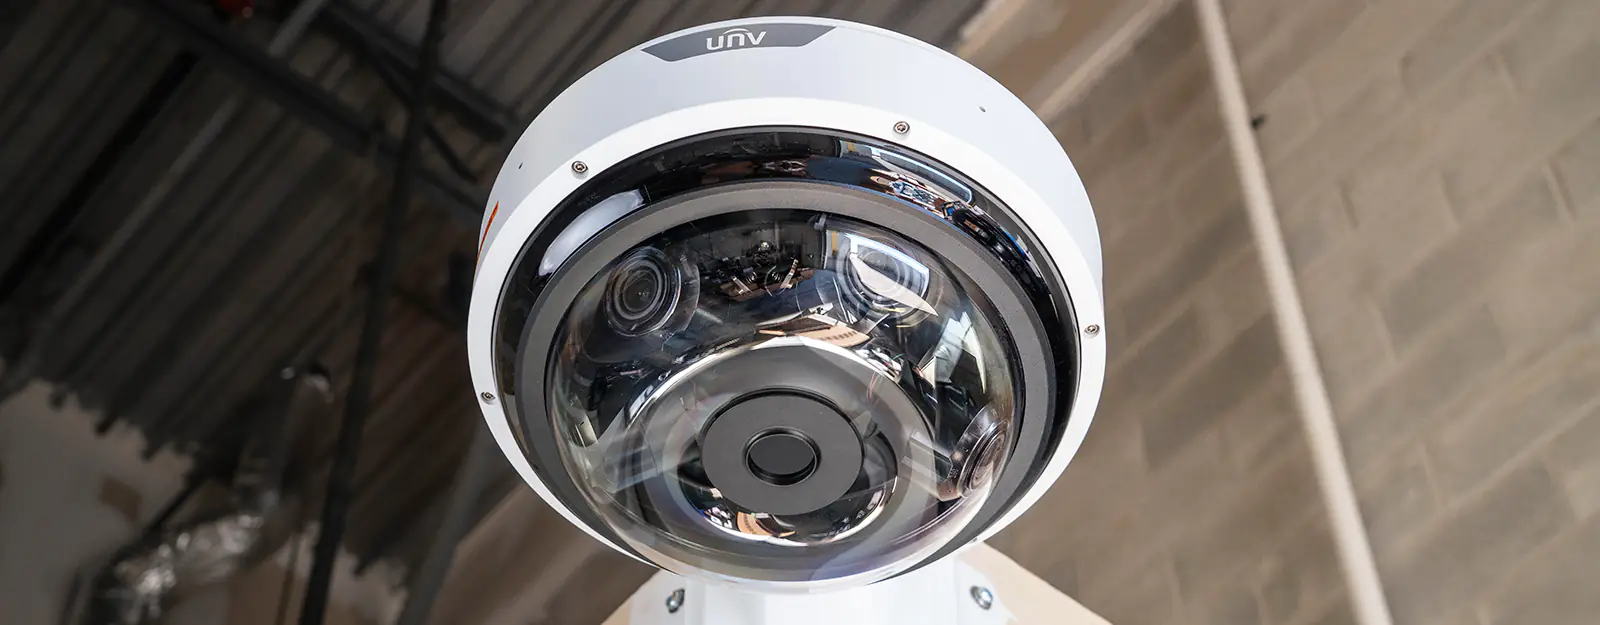
Released in Q4 2024, the new Uniview multi-sensor camera contains four lenses in a single housing. The lenses can be adjusted during installation to cover different angles and views.
These lenses also feature 5x optical zoom (2.7-13.5mm), allowing you to focus the camera on specific locations for high-fidelity video. The zoom can be adjusted after installation using the PTZ controls from the NVR or UNV-Link app.
We received an early production sample and had an opportunity to see how this camera performs. In this article, I’ll be covering the features, installation, and image quality of the IPC8645EA-ADZKM-I1 multi-sensor dome camera.
What’s are the Benefits of Multi-sensor Cameras?
If you’re reading this article, you likely already know a few benefits to multi-sensor cameras. But I’ll list a couple anyway:
- Save on Cabling Infrastructure – A single network cable is all it takes to power this 4-in-1 camera. This can save you significant money in cabling costs.
- Save Labour Costs – Why install 20 cameras when you can use 5 multi-sensor to cover the same area? This will speed up installation time, saving labour costs.
- Less Complexity – With a multi-sensor camera, you only have one IP address on the network to worry about. You also just need to keep one camera updated instead of four.
Anyways, enough preamble. Let’s get straight into the facts and features of this new camera.
Features & Specifications – Uniview Multi-sensor Dome (4 x 5MP Sensors)
When you first open the box, you’ll notice just how heavy and well-built this camera feels. It weighs just under 5 kg (10.5 lbs) – giving it respectable heft, especially when carrying it up a ladder.
The camera itself is made up of 4 x 5MP LightHunter sensors. These sensors provide clear images of the scene even in poor lighting conditions. By removing the dome cover, you can adjust the direction of the lenses. The lenses slides around on a rail, allowing you to adjust the direction of each camera.
You can also tilt the lenses up, down, and rotate them to get the perfect angle. In addition to manual adjustments, the lenses have a motorized 2.7 – 13.5mm zoom component. This means you can decide how close-up of a shot you’ll get from each of the lenses. You can control the zoom from the camera’s web interface or through the UNV-Link app using the PTZ controls.
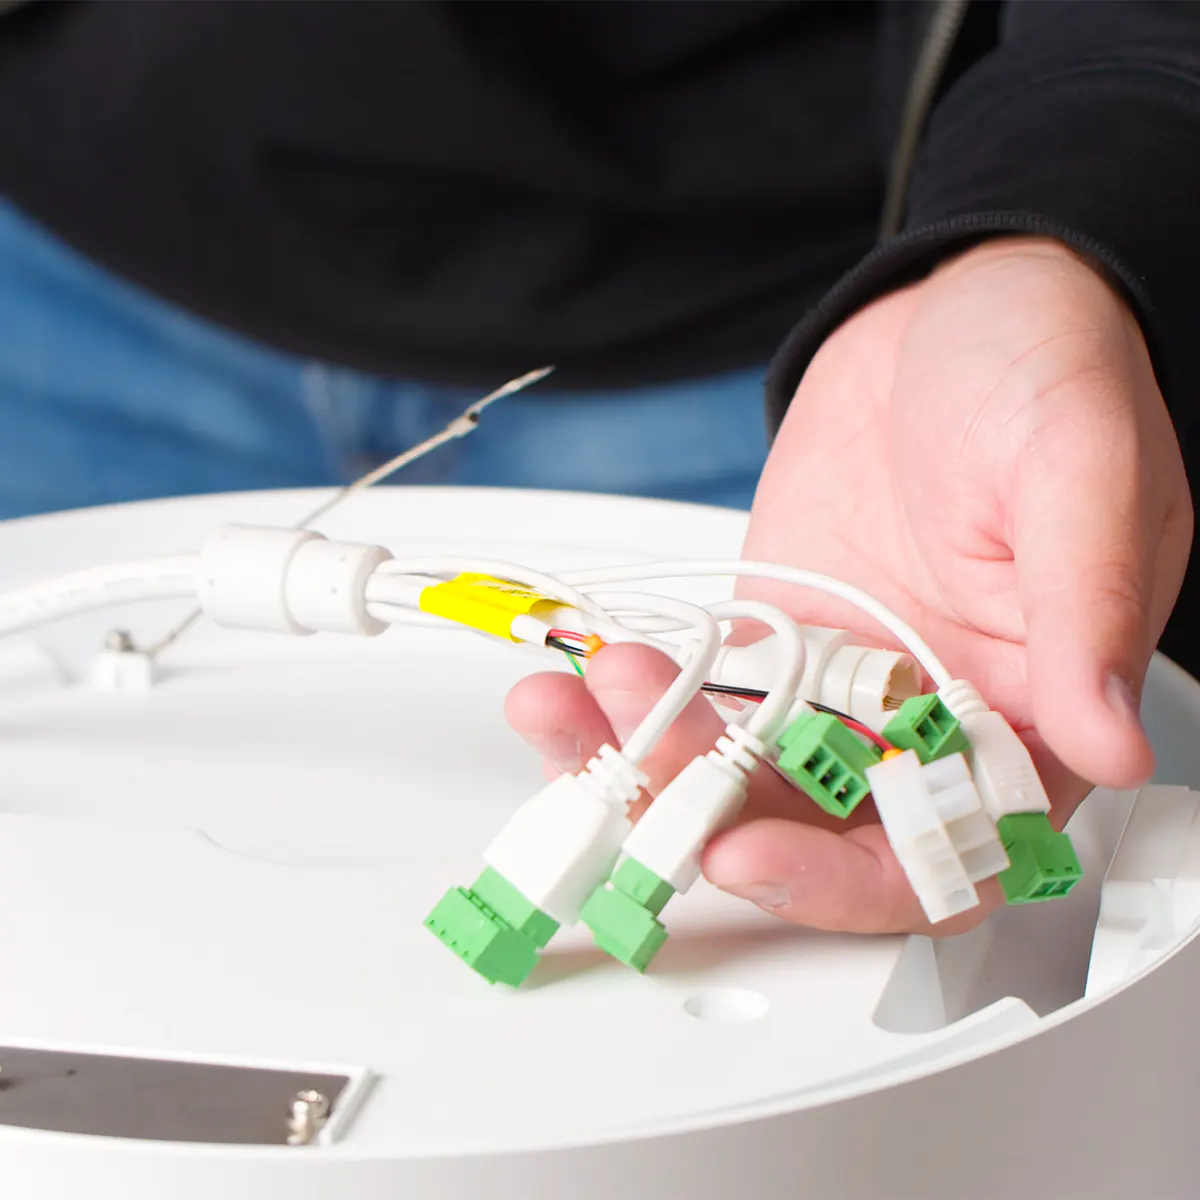
Enhanced Cable Harness for Alarms, Audio, and 12V DC Output
The cable harness on this camera is one of the most extensive – if not the most feature rich cable harness you’ll ever see. It features a bunch of connectors and terminals for connecting with external devices.
Here’s a full list of what’s included on the cable harness:
- 24V AC input (optional power to the camera)
- 3 alarm inputs + 2 alarm outputs
- 1 audio input + 1 audio output
- RJ45 Ethernet for PoE++ (60W) to power the camera
- 12V DC output (for powering external alarm or audio device)
The last one is quite interesting. The 12V DC output is a passthrough power source that you can use to power an external device like an alarm or speaker. This saves you from running a separate power supply for an external device.
While it may be a niche use case, I’m sure someone will find this 12V DC output very helpful.
You can enable it by logging into the camera and navigating to: System->Maintenance -> Power Output and turning 12V DC output to ON.
Built-in Microphone & PoE++ Requirement
This camera also has a built-in microphone. The microphone is disabled by default but can be enabled in the camera’s settings.
Also, this camera is quite hungry in terms of power consumption. It requires PoE++ (60W) of power to ensure all the infrared LEDs can turn on. However, if you force the camera into day mode then you can use a PoE+ power source (30W) without issue.
We measured a current draw of 29.08W with the IR LEDs turned on, and 14.86W with the IR disabled.
Installation & Mounting Brackets
Out of the box, this camera can be mounted directly to a ceiling, using the included mounting plate. If you plan to mount this camera to a wall or a corner, you’ll need a few more accessories.
The most important accessory for this camera is TR-UF45-K-IN. This is an adapter plate with 1-1/2″ G2 thread on top. Using this adapter plate, you can connect the camera with PTZ accessories such as TR-WE45-A-IN for wall mounting, or the TR-CE45 pendent mount.
You can also combine the wall mount bracket with a corner mount bracket for mounting this camera on the corner of a building or interior wall – which is how we mounted it during our testing.
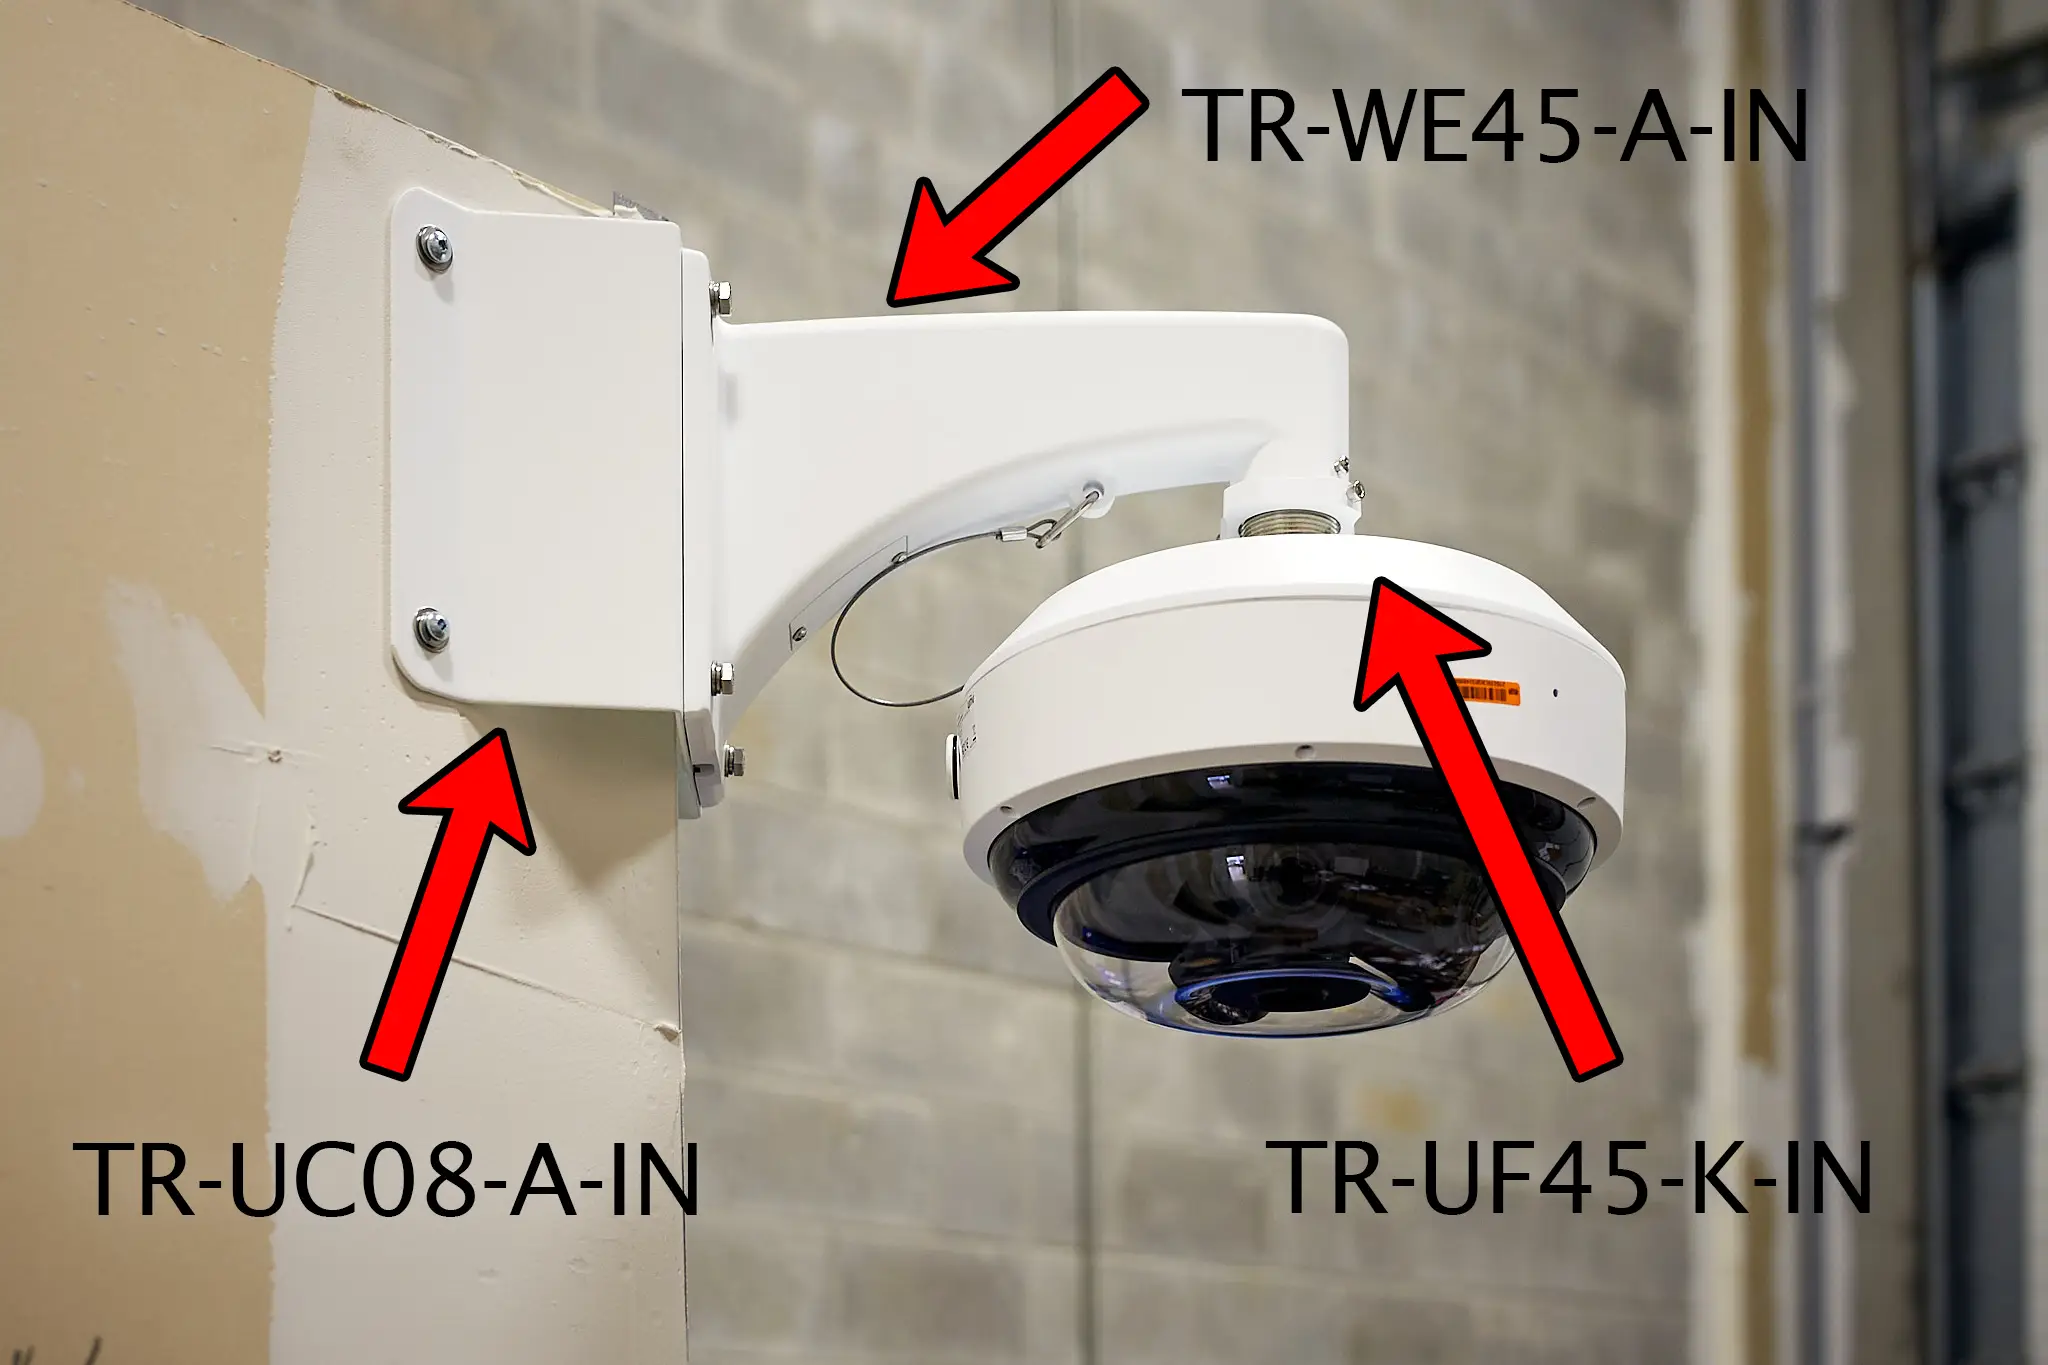
Image Quality – Day, Night, and Zooming
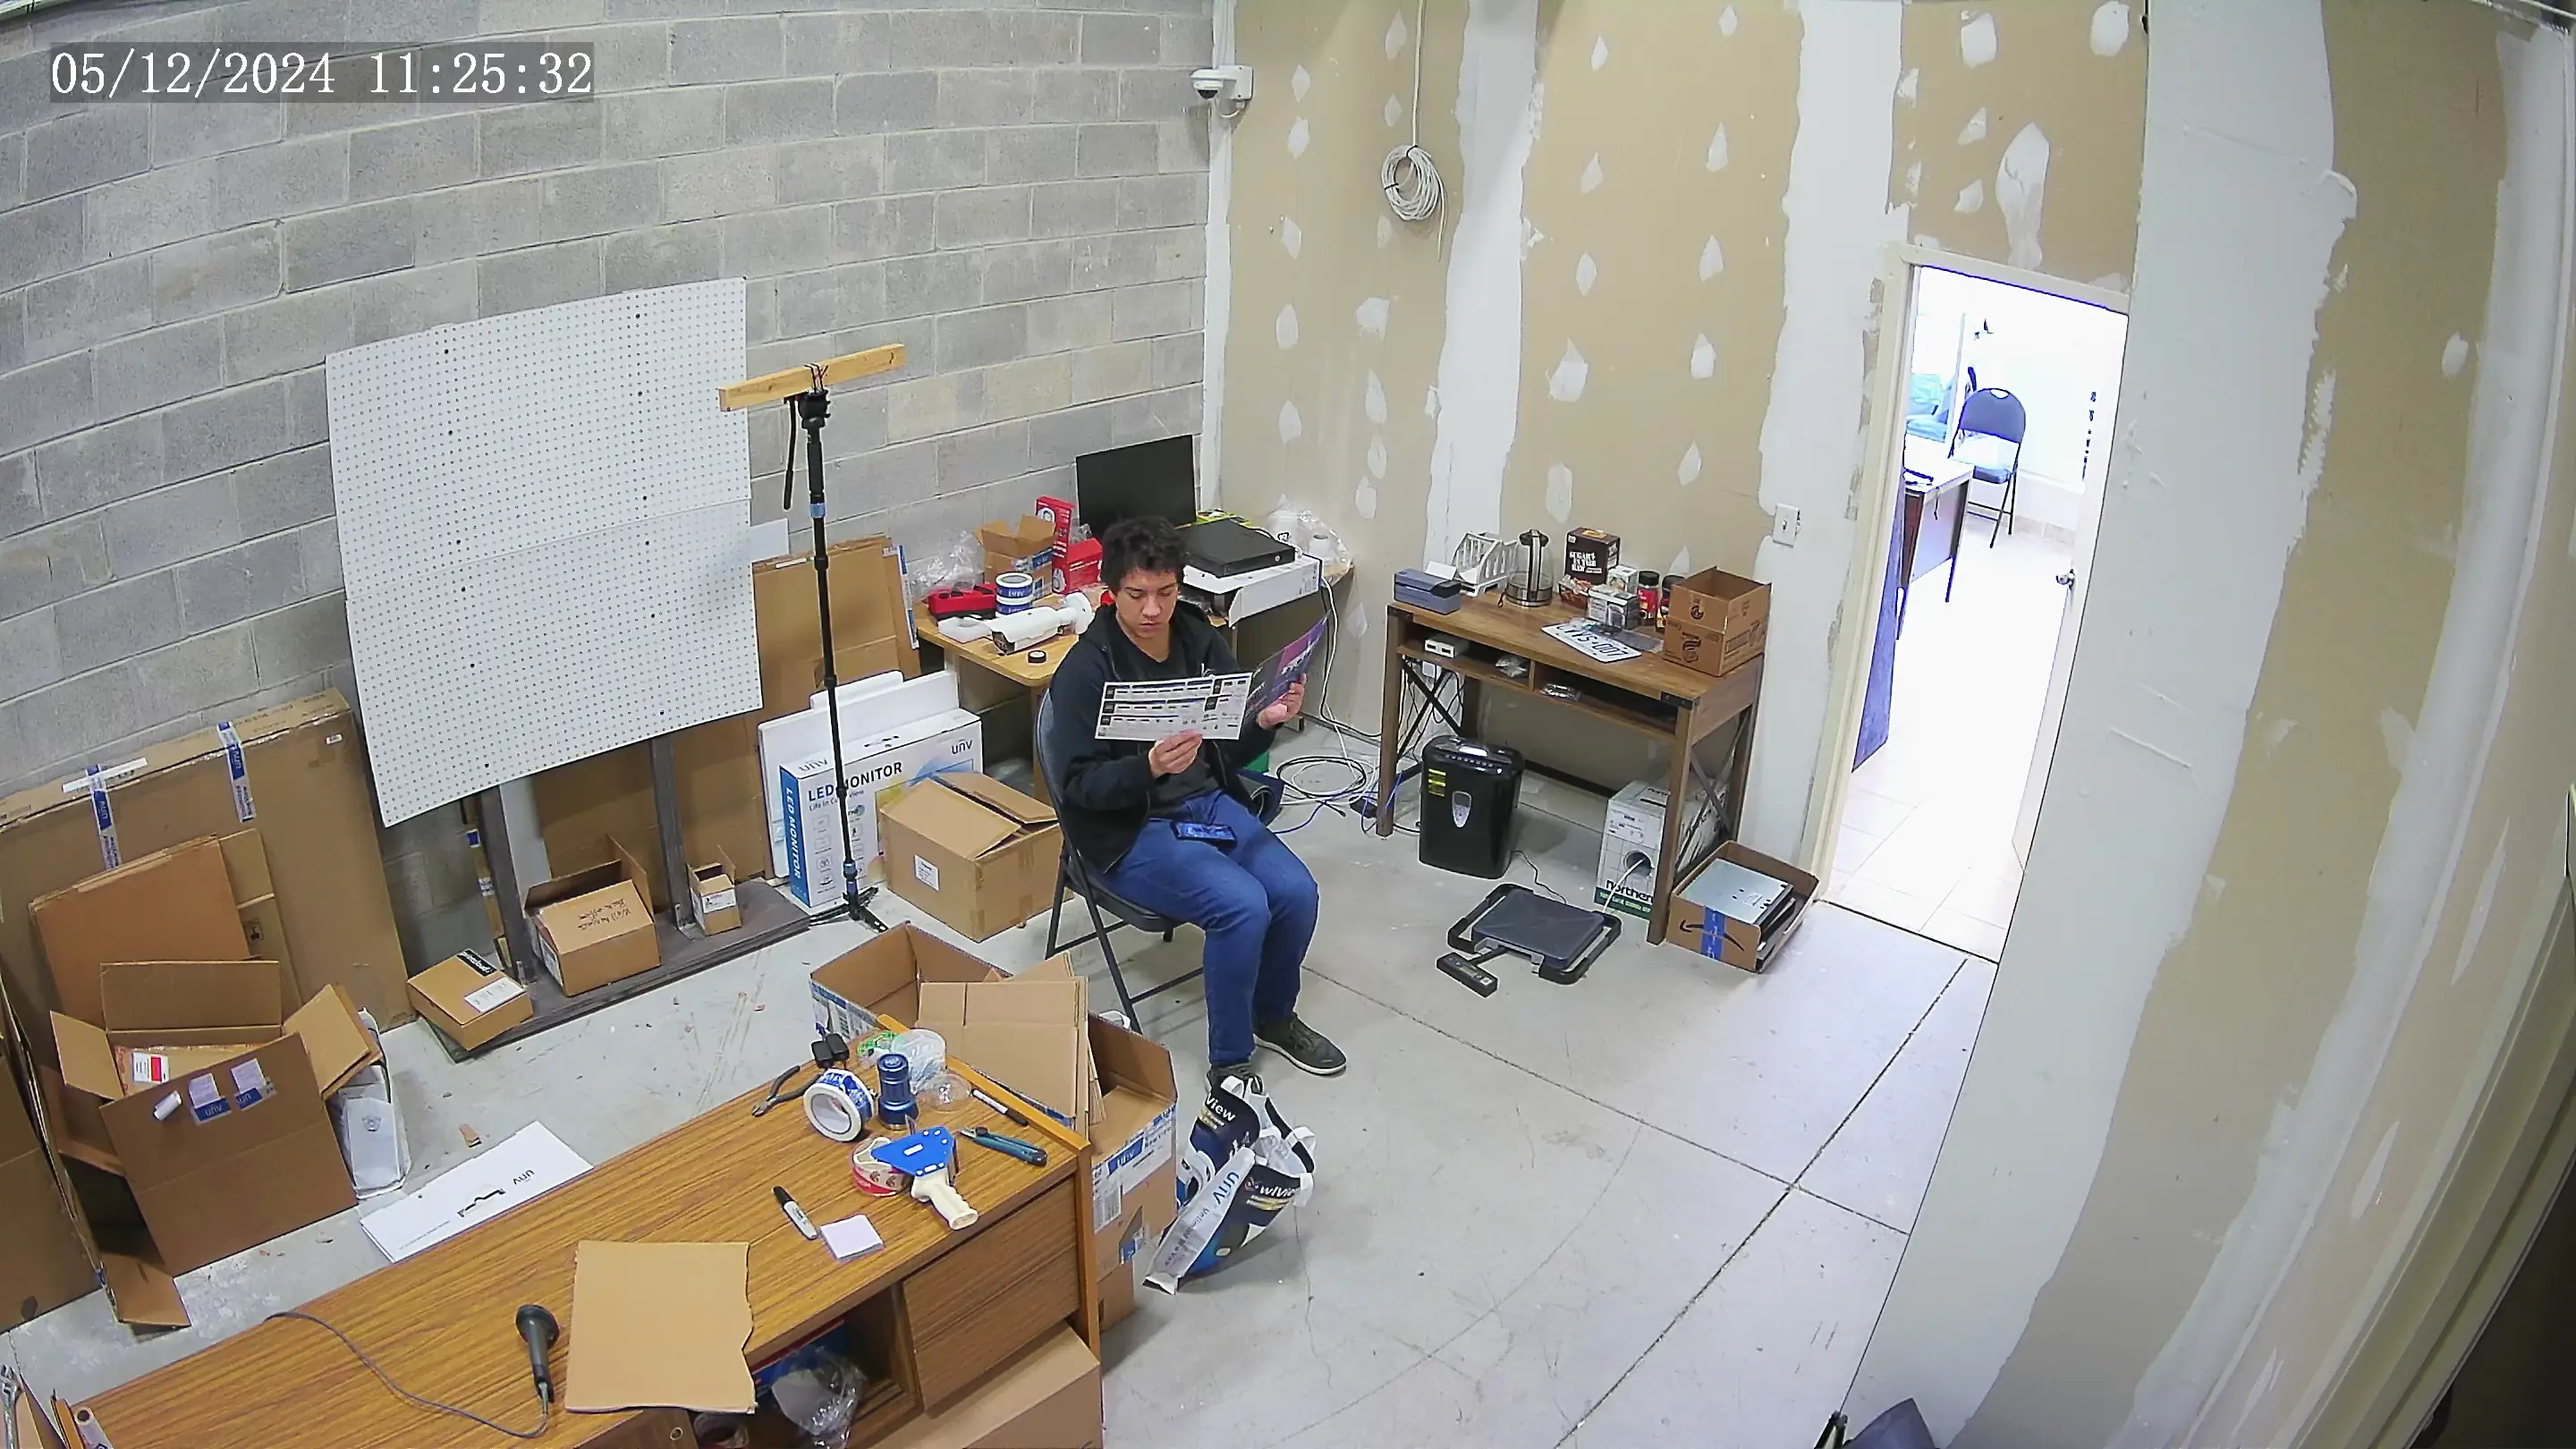
This camera provides excellent image quality from each of the lenses. Each sensor outputs a 2880×1620 @ 30 fps stream, also known as 5MP resolution.
The video is sharp and vibrant, as we’ve come to expect from Uniview. There is very minimal distortion from each of the lenses – and they provide a large area of coverage.
Night Mode (infrared turned on)
When it gets dark, the IR lights will turn on to keep the image bright. There are two IR LEDs on each of the lens and one downwards facing LED to light the area directly below the camera.
Of course, infrared results in an image that’s black & white. Make sure you have sufficient lighting near this camera if you want to see colour 24/7.
Night Mode (outdoors without IR)
Uniview also provided us with some footage of the camera at night. The footage was recorded in the early morning at ~4:11 AM.
Despite being recorded at night, the video looks impressively colourful and detailed. The Uniview Multi-Sensor Dome does a great job overlooking the road and monitoring traffic around the building.
Motorized Varifocal Zoom
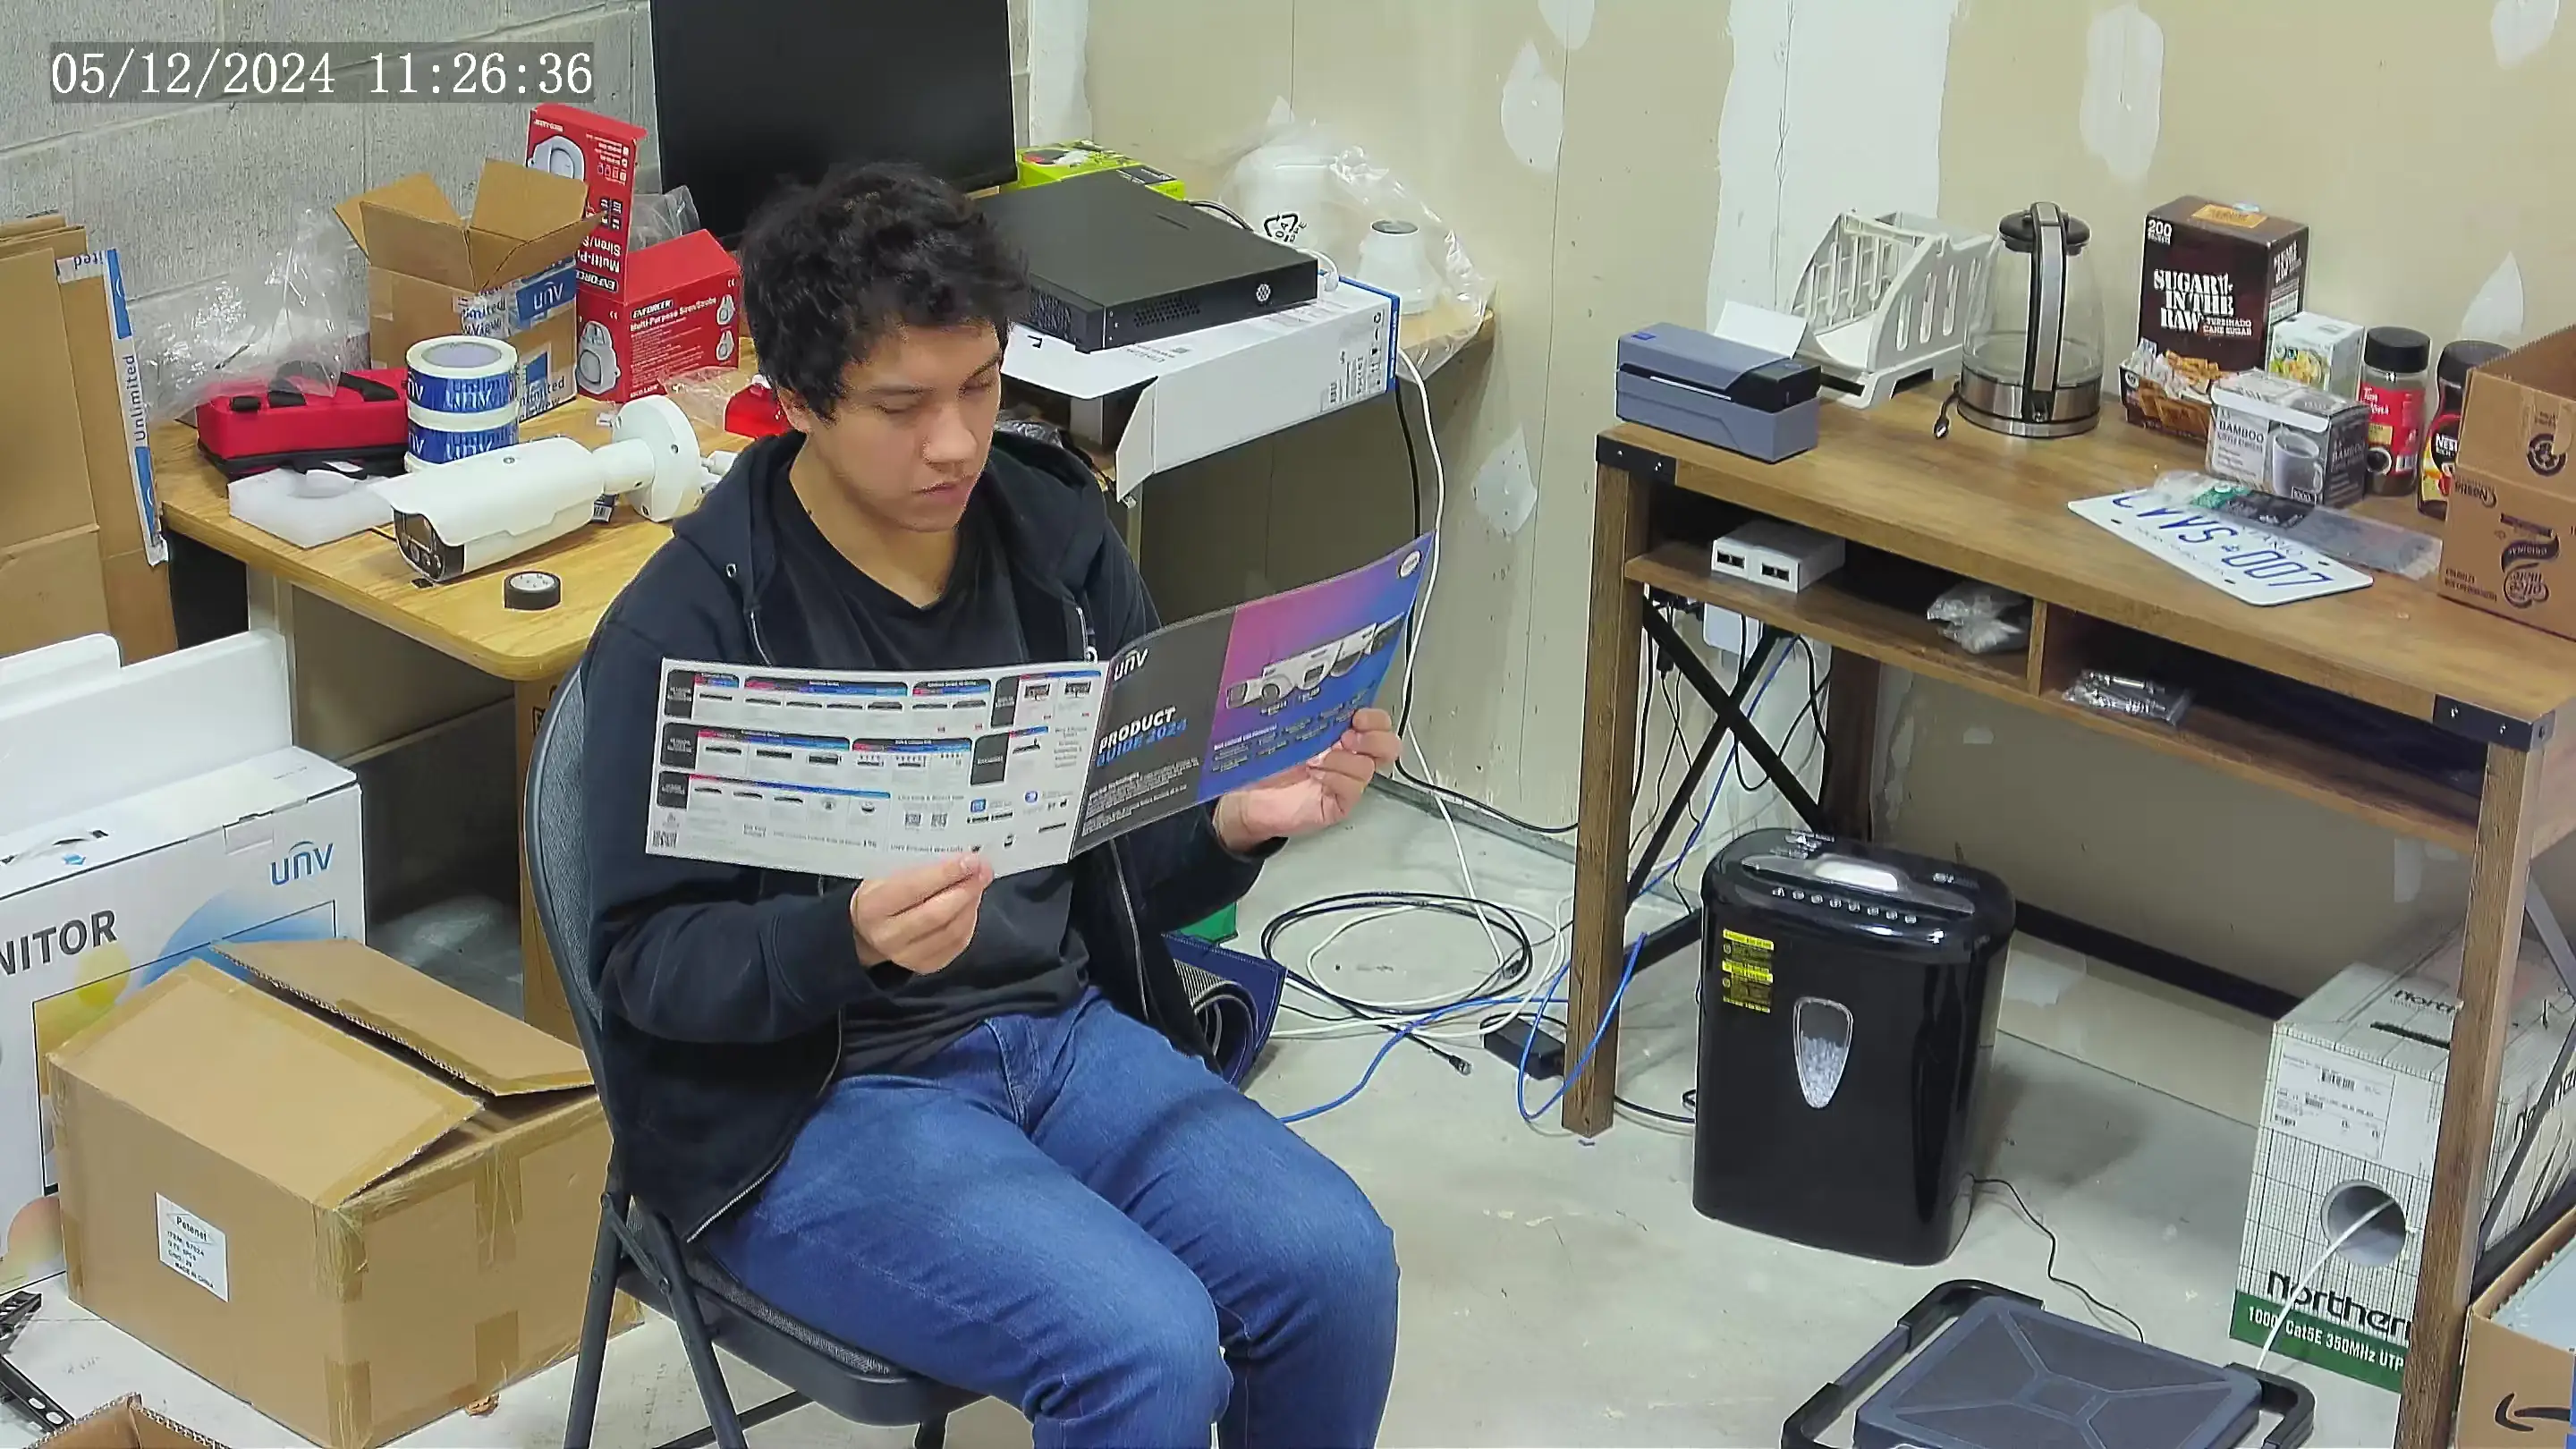
The lenses on this camera are 2.7 – 13.5mm (5x zoom) which can be adjusted through the PTZ controls. At the widest angle, a single lens covers 110° horizontally. With maximum zoom, this decreases to just 31° horizontal coverage.
You can freely zoom anywhere within the range, allowing you to adjust the camera to the perfect view for each scenario. The more you zoom in, the more detailed the video will become.
Adding Multi-Sensor Camera to an NVR
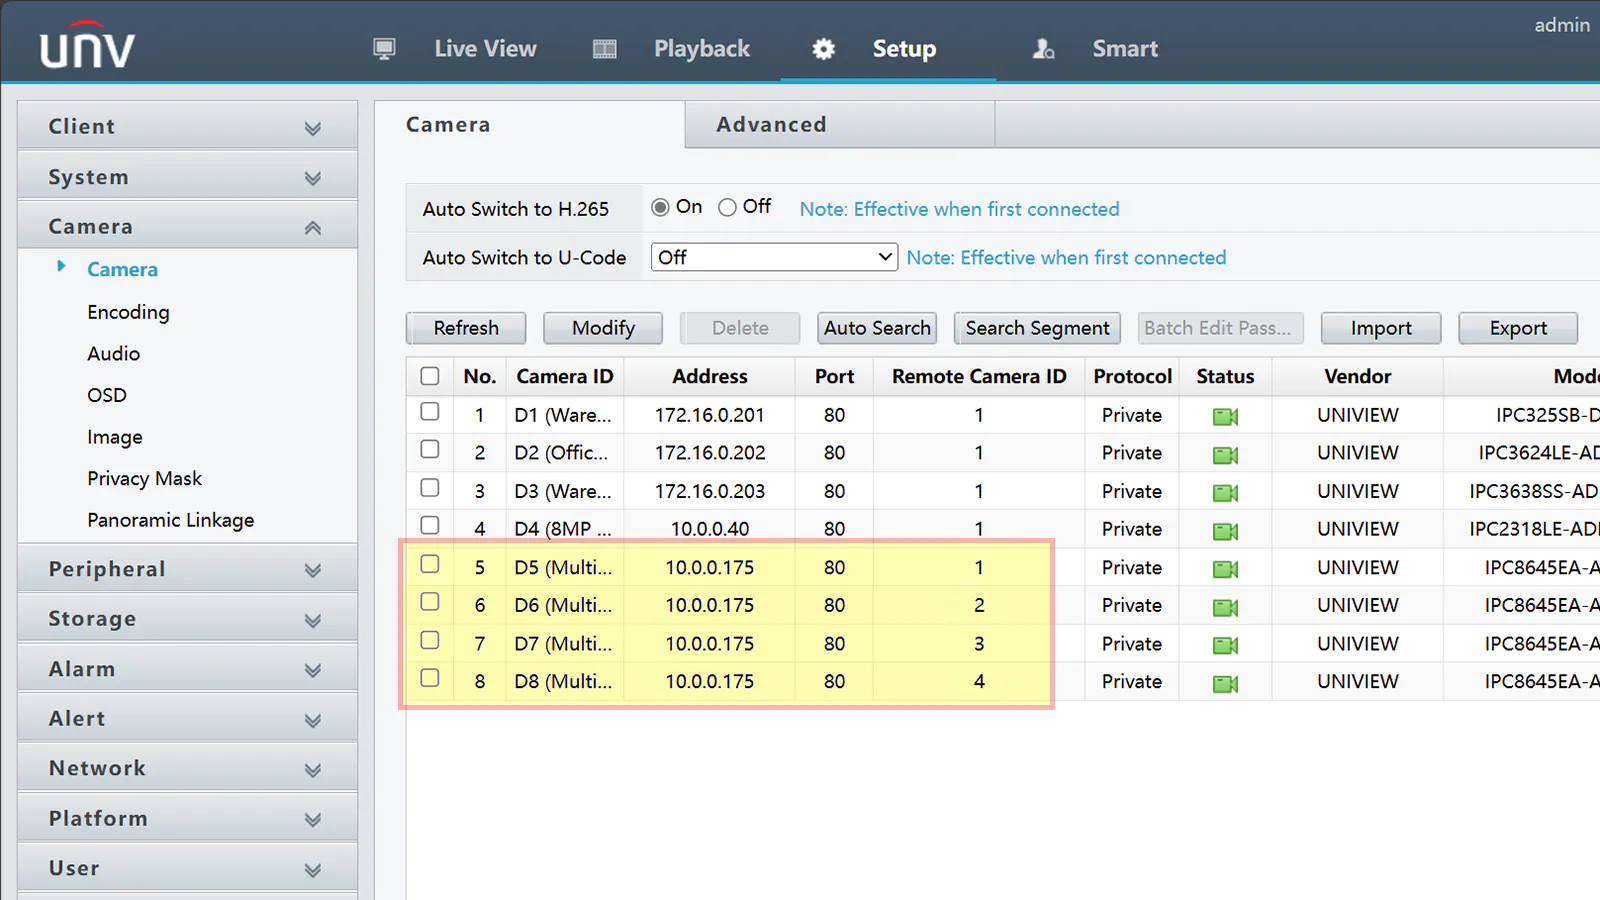
When adding this camera to an NVR, you should use the same IP address but a different Remote Camera ID for each of the lenses. For example, our camera uses the IP address 10.0.0.175 – so for channel D1 you should add “10.0.0.175 / Channel ID 1“.
For the second channel you’d add “10.0.0.175 / Channel ID 2“… For the third channel it’ll be “10.0.0.175 / Channel ID 3” and so on.
You can see an example in the screenshot below:
Cost-savings With VMS Platform Licensing
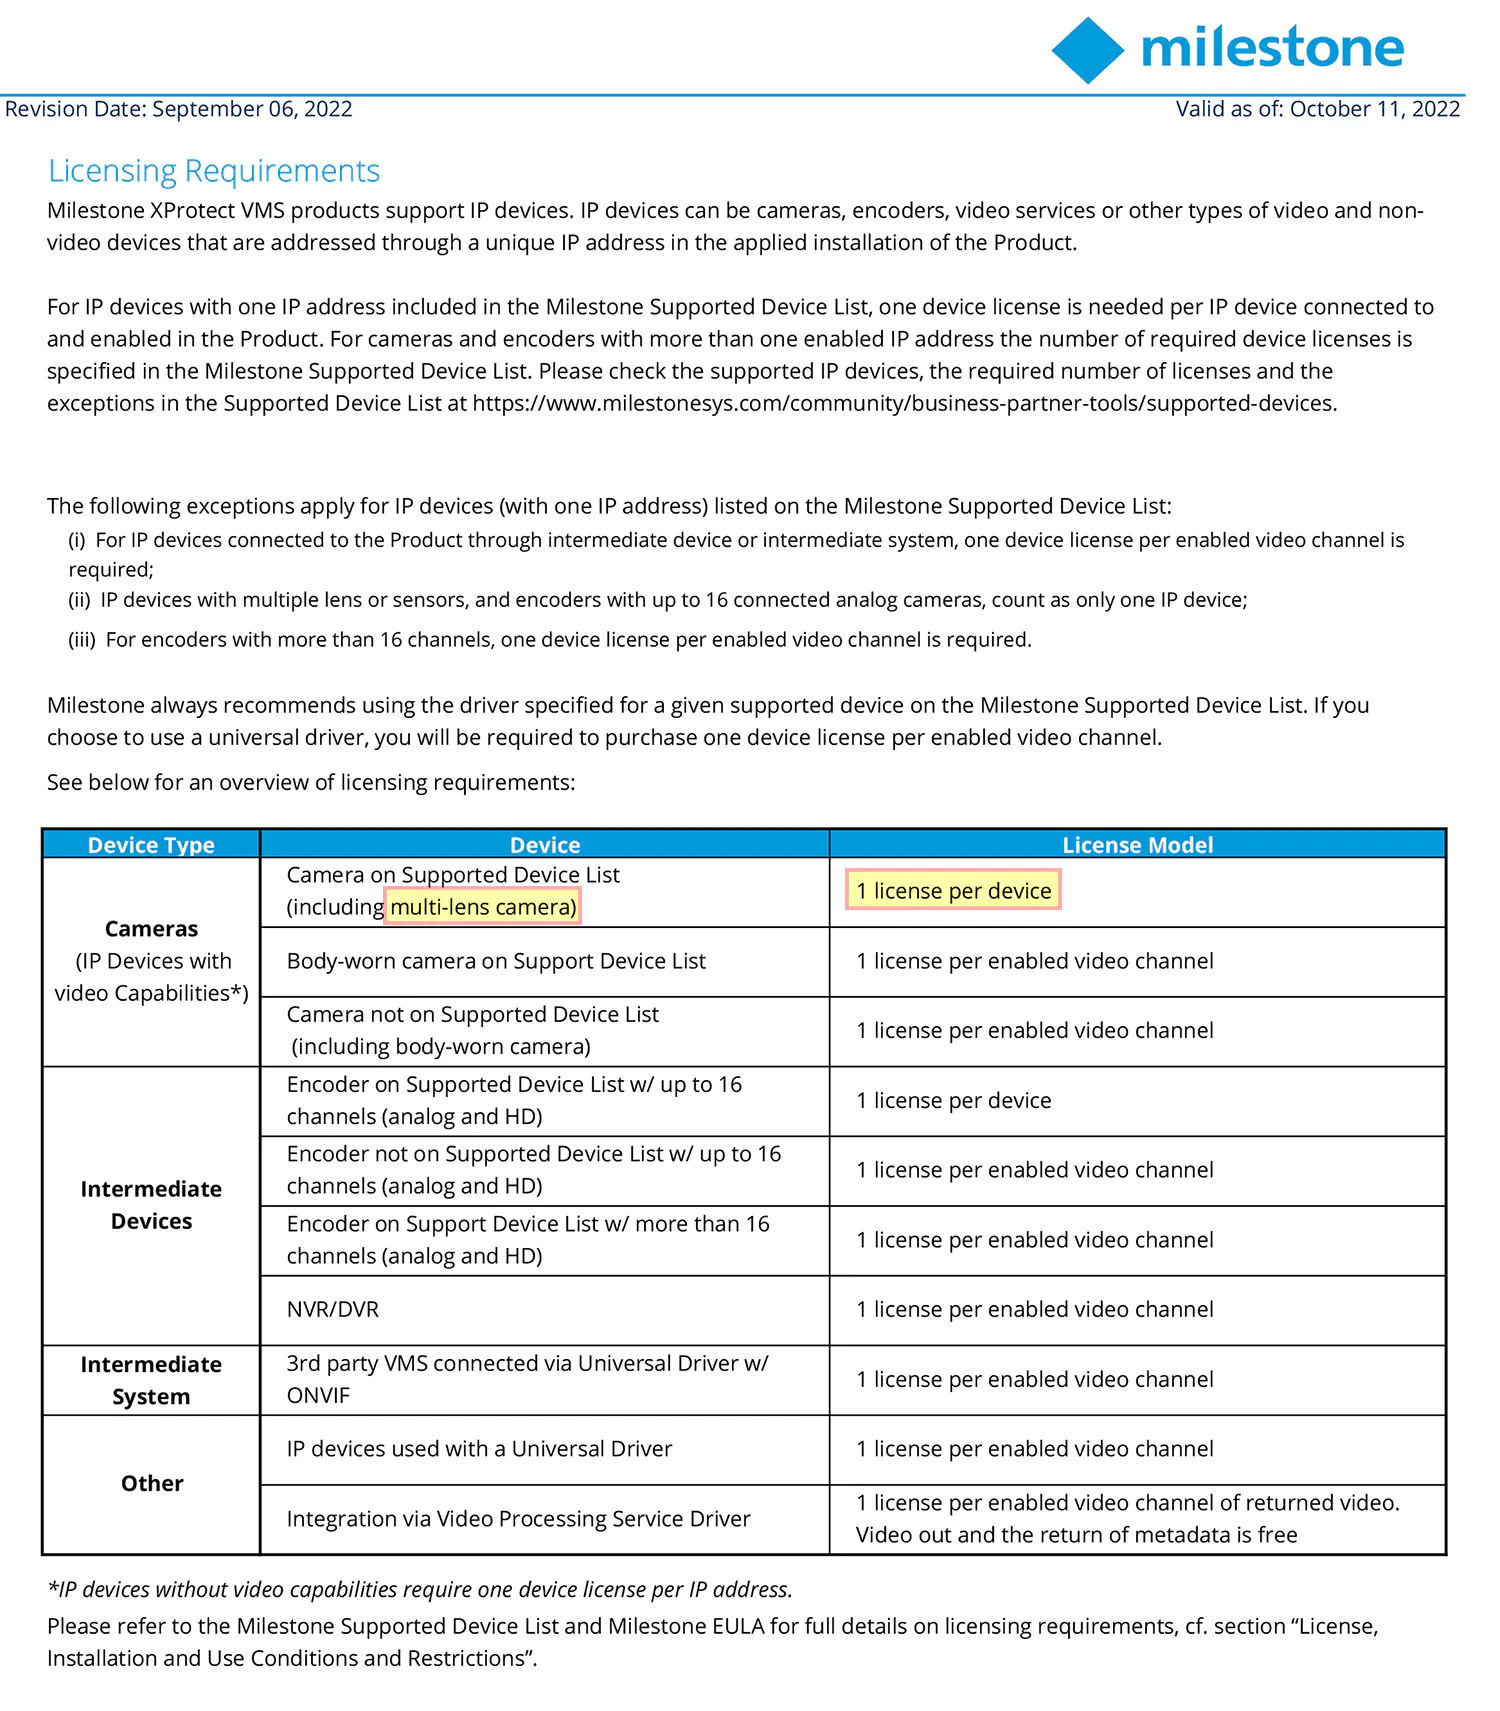
If you’re adding this camera to a VMS platform (such as Milestone or Genetec), you can save money with a multi-sensor camera. According to their licensing agreements, you only need to pay for one license fee with multi-sensor cameras.
So, instead of paying for four individual licenses, you only need a single license when adding a Uniview Multi-Sensor Dome!
Weatherproof & Temperature Resistance
This camera has an IP67 weather rating, allowing it to be used outdoors in harsh weather. It also has a wide temperature range from -30°C to 60°C, which makes it suitable for northern climates or places near the equator.
It also has 6KV surge protection, which is an improvement over the standard 4KV protection found in other Uniview cameras.
Final Thoughts
It’s great to see Uniview release a professional multi-sensor camera. After testing, it appears there were no compromises in the design or image quality. This camera performs in-line with similar cameras in the market.
If you’d like to purchase one for your project, please contact us at XLR Security. We’re located in Toronto and ship across Canada.

