If you’re like me, you’re probably wondering how the **** to add your NVR or cameras to the UNV-Link app via IP address. When you go to add a device, the app only gives you the option to scan the QR code or enter the register code manually. There’s not a single mention of IP address in the “Add Device” menu.
While it may look like there’s no option – there actually is one. It’s just hidden away in a different menu.
Adding via “Local Device” in UNV-Link App
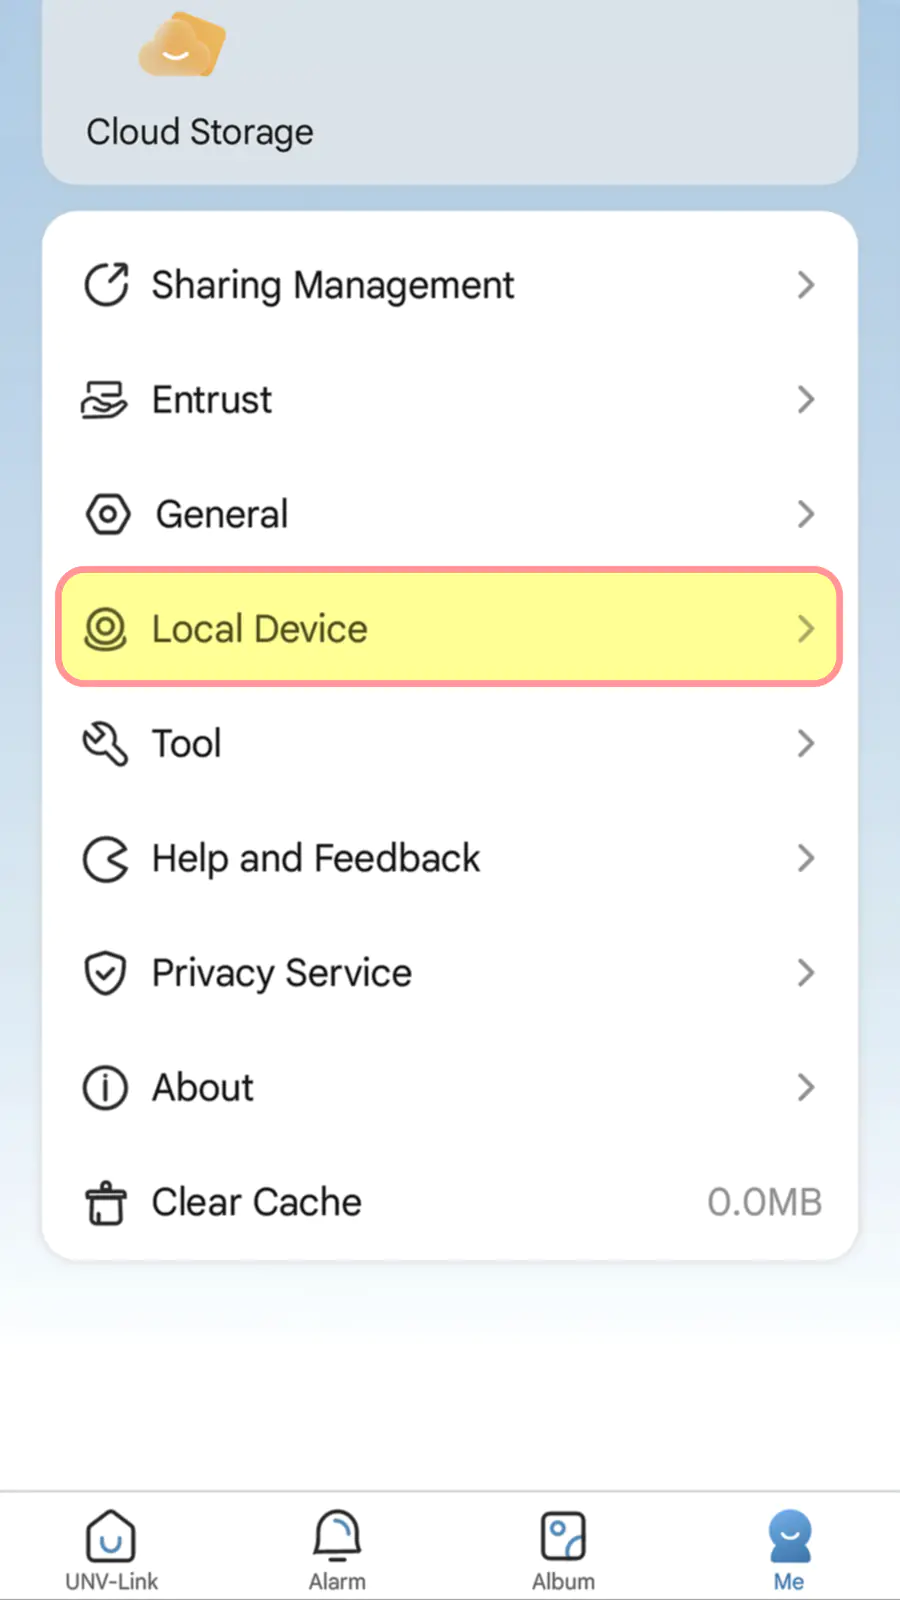
To add a device in UNV-Link using an IP address, you’ll need to navigate to the “Local Device” menu. This can be found under the “Me” tab at the bottom of the app. Then you’ll have the option to Auto Search in LAN for a local device, or Manual Add – click the latter.
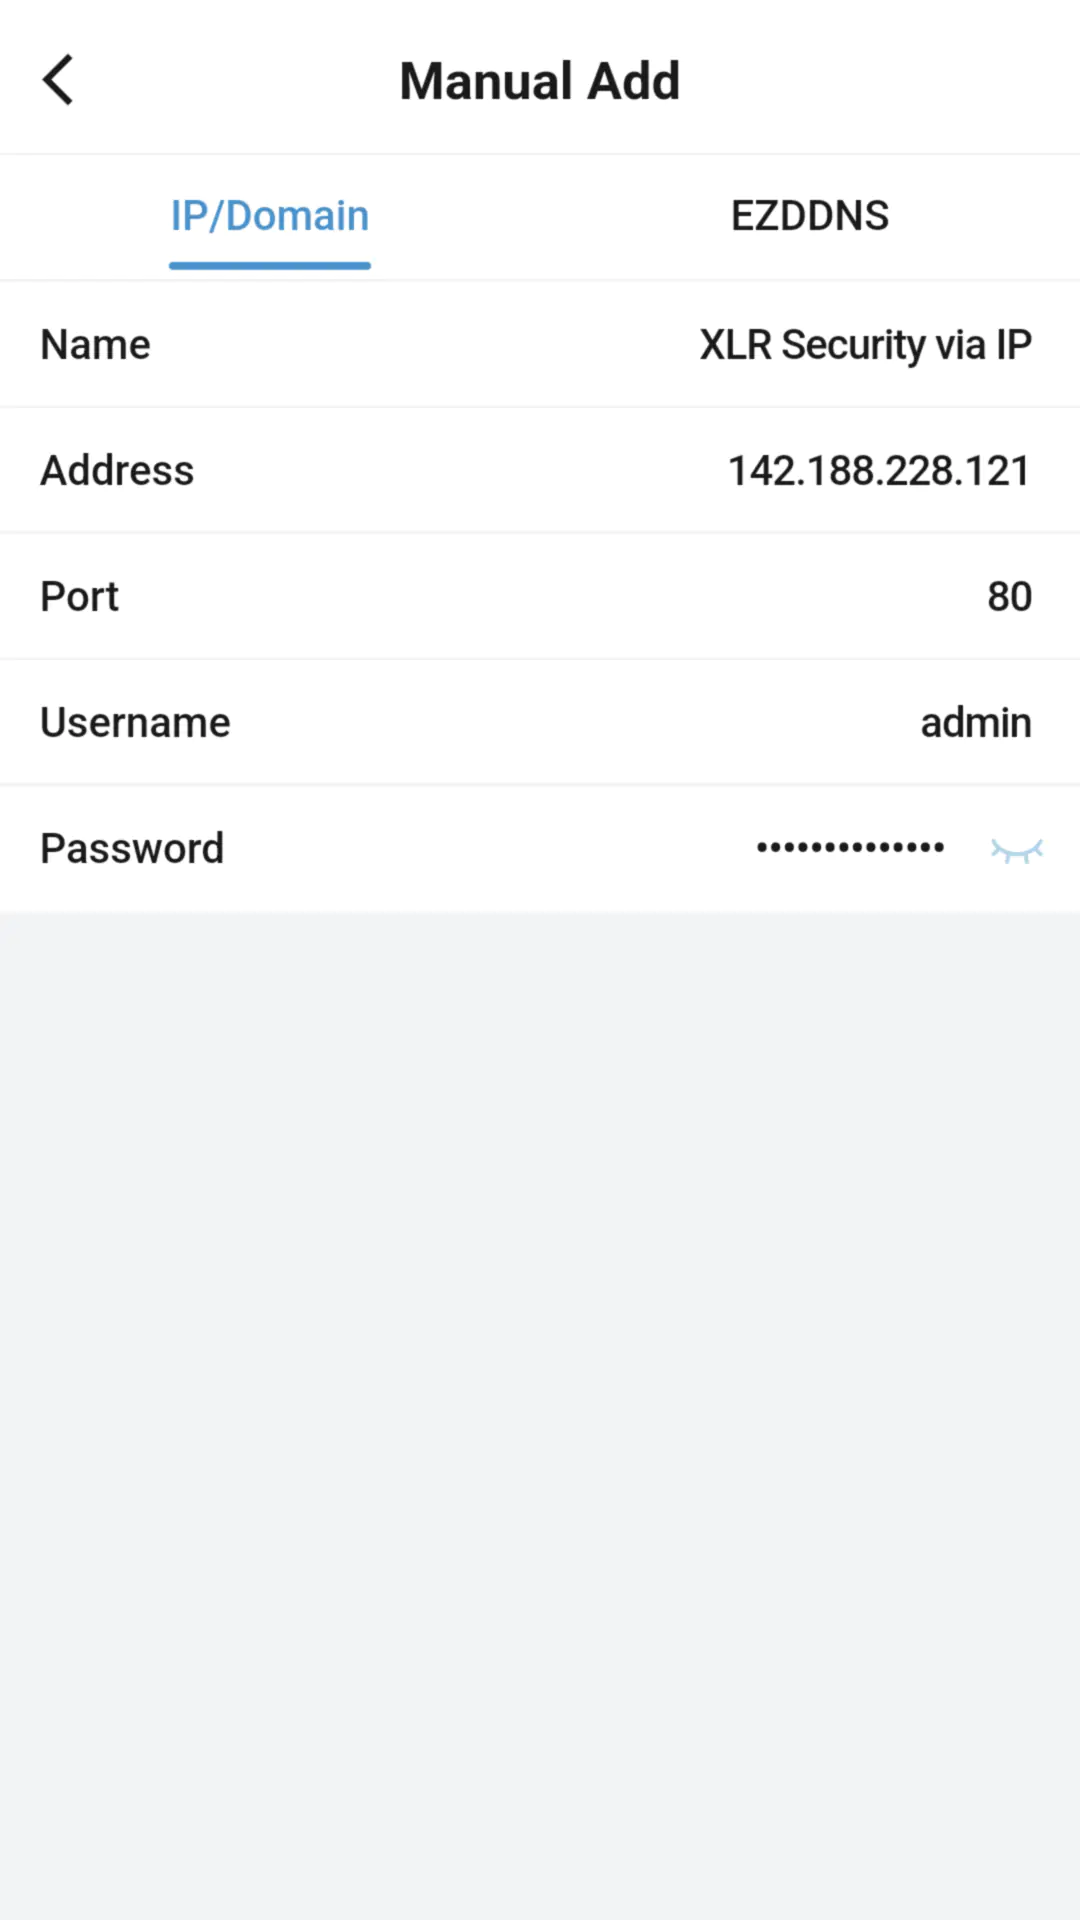
Now, you can either add the IP/Domain or via EZDDNS. If adding via IP, you will need to enter the IP address of the NVR, the HTTP port (default 80), and the password of the NVR. After entering your device’s information, click the blue “Add” button at the bottom to complete the setup.
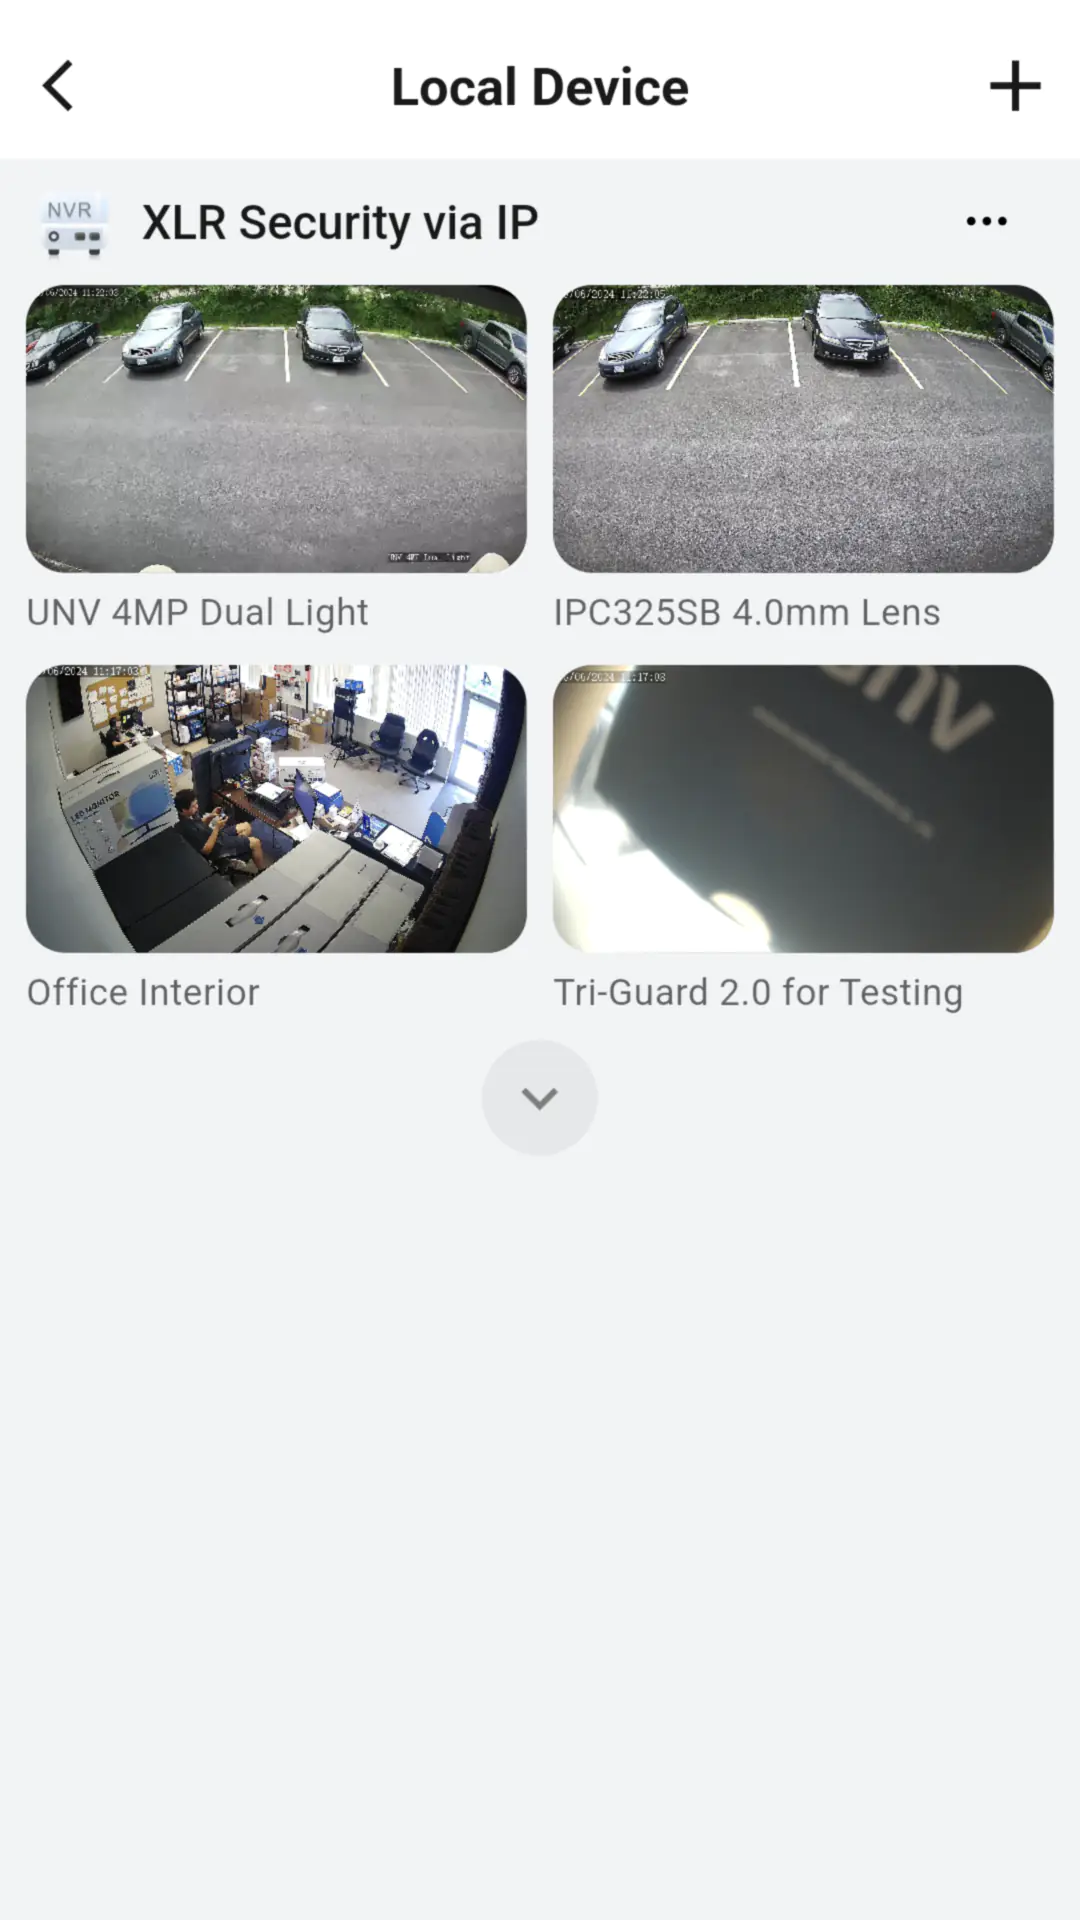
Viewing Local Devices in UNV-Link
Now that your device has been added, you can view it by going to the same “Local Device” menu in UNV-Link. You will see a list of all your cameras displayed there – and if you add multiple devices those will also be shown.
Simply tap on one of the camera thumbnails to open it in Live View. You can also view playback of the cameras depending on how much storage you have in the NVR. Swipe left and right to change to the next or previous camera.
Final Thoughts
Hopefully you were able to get it working – if you’re still having issues be sure to contact your local Uniview Distributor for technical support.
Also, the screenshots in this article were taken on June 5th, 2024 using UNV-Link app version 2.7.1 on Android. The interface may change slightly in the future but the basic concepts should remain the same.

