The UNV-Link app allows you to watch security cameras through live view and playback. You can also share your cameras with other users so they can keep an eye on them.
Sharing is done through your EZCloud account – this is the account you sign up for after opening the UNV-Link app for the first time. The other user must have registered for an account as well on the app.
Basic Sharing Functions
Basic sharing means you’ll share an NVR (or single camera) with another user on UNV-Link using their email address.
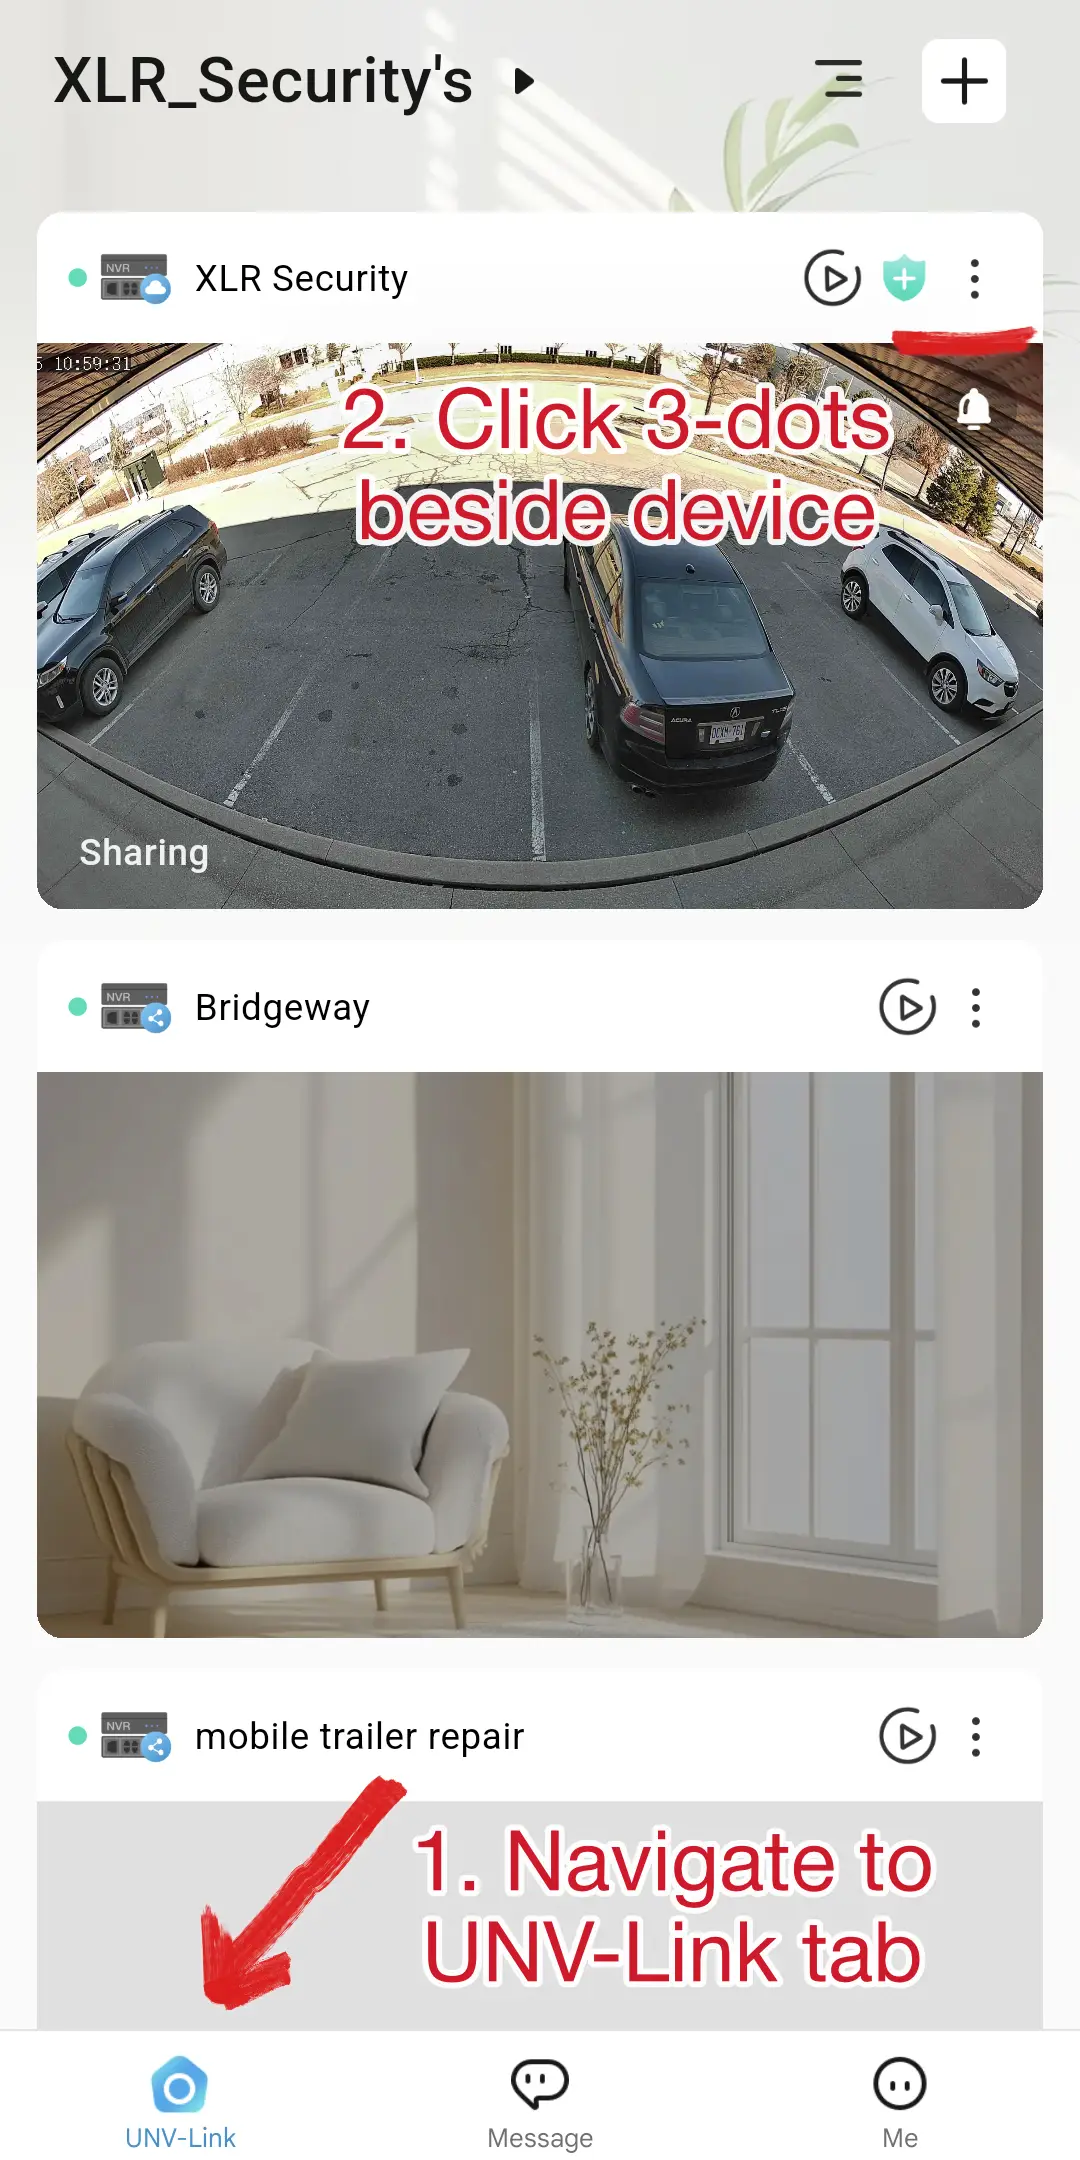
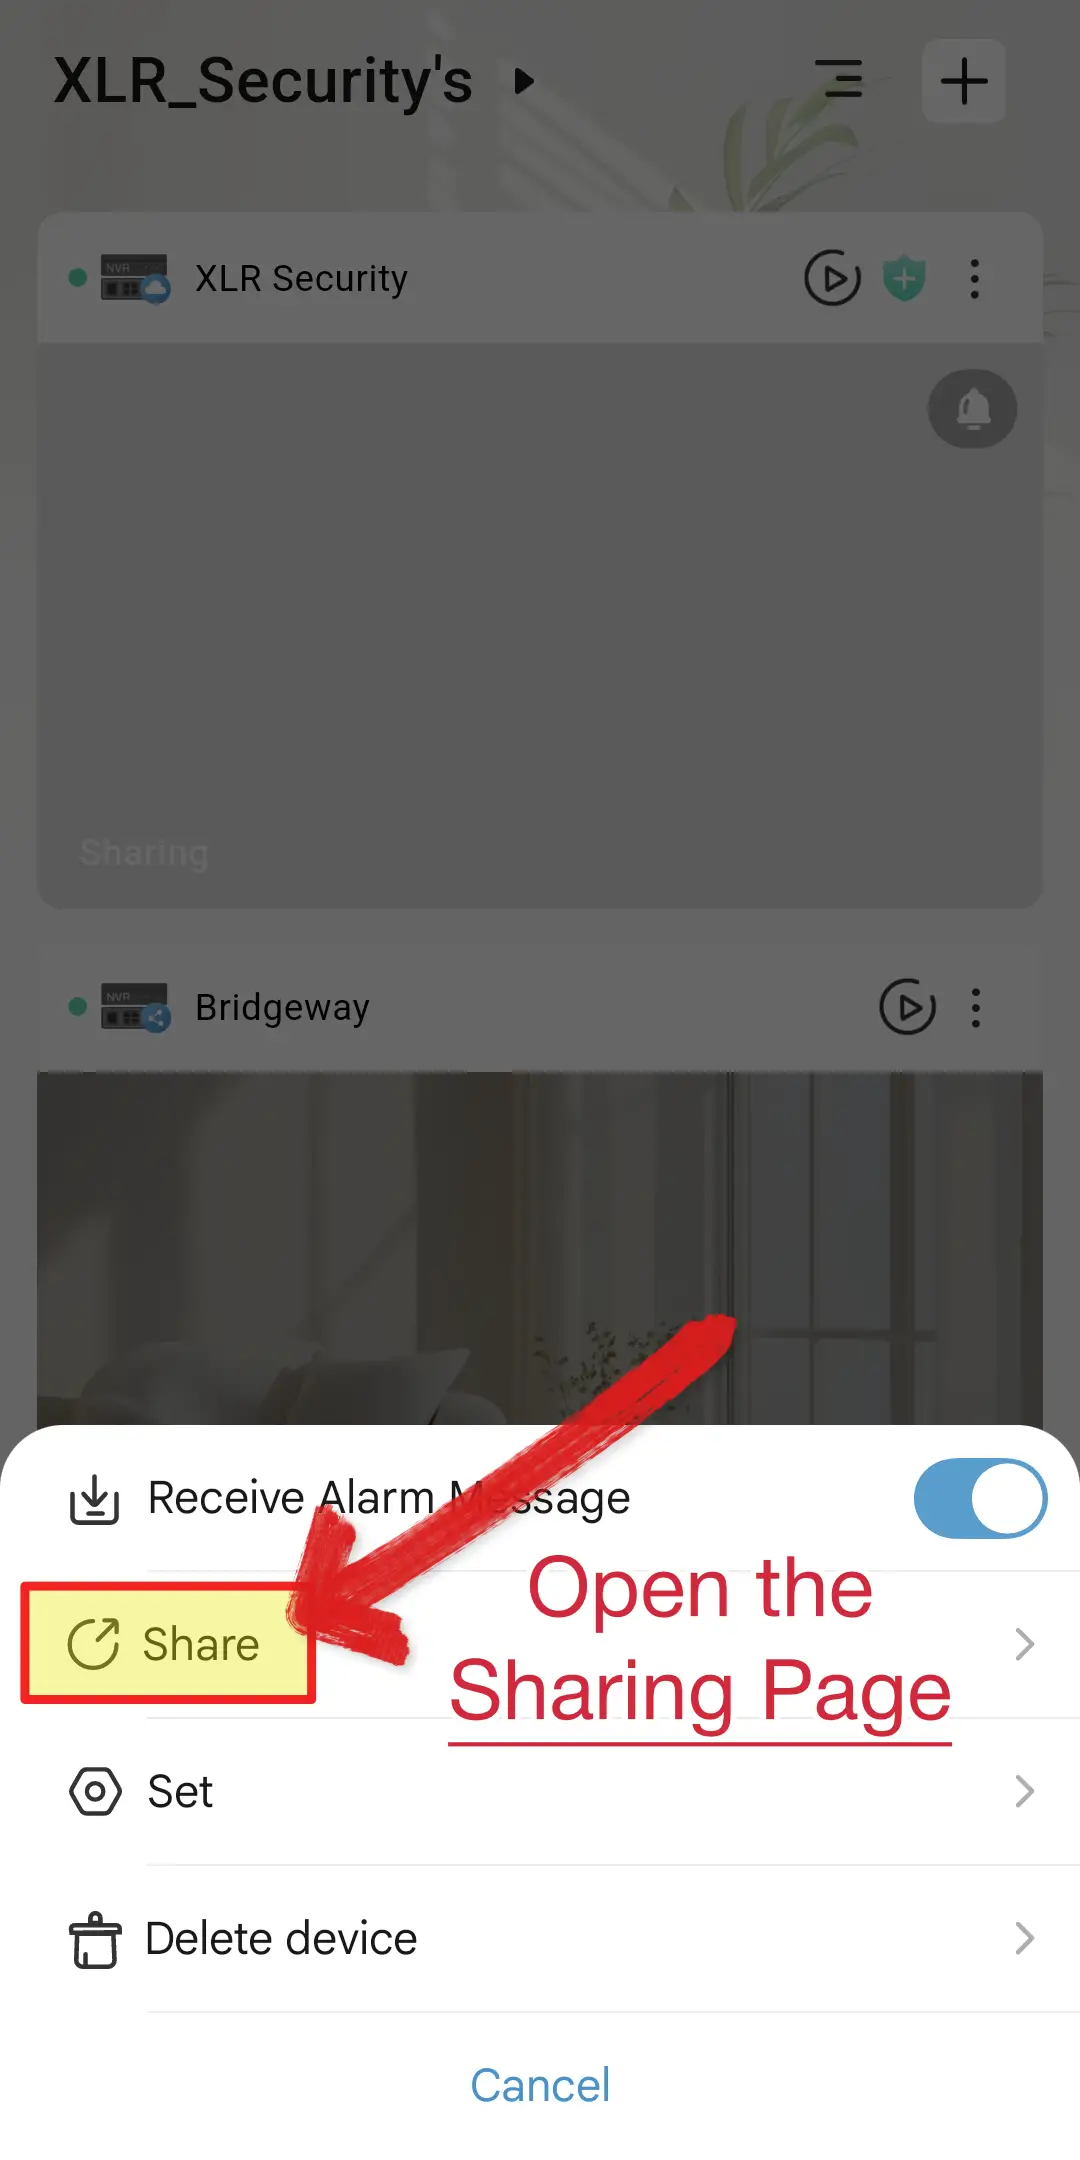
To get started, open the UNV-Link App and go to the main tab at the bottom left. Then, select the three dots icon ⋮ beside your device and choose Share. This opens the sharing menu – where the most of the sharing functions can be accessed.
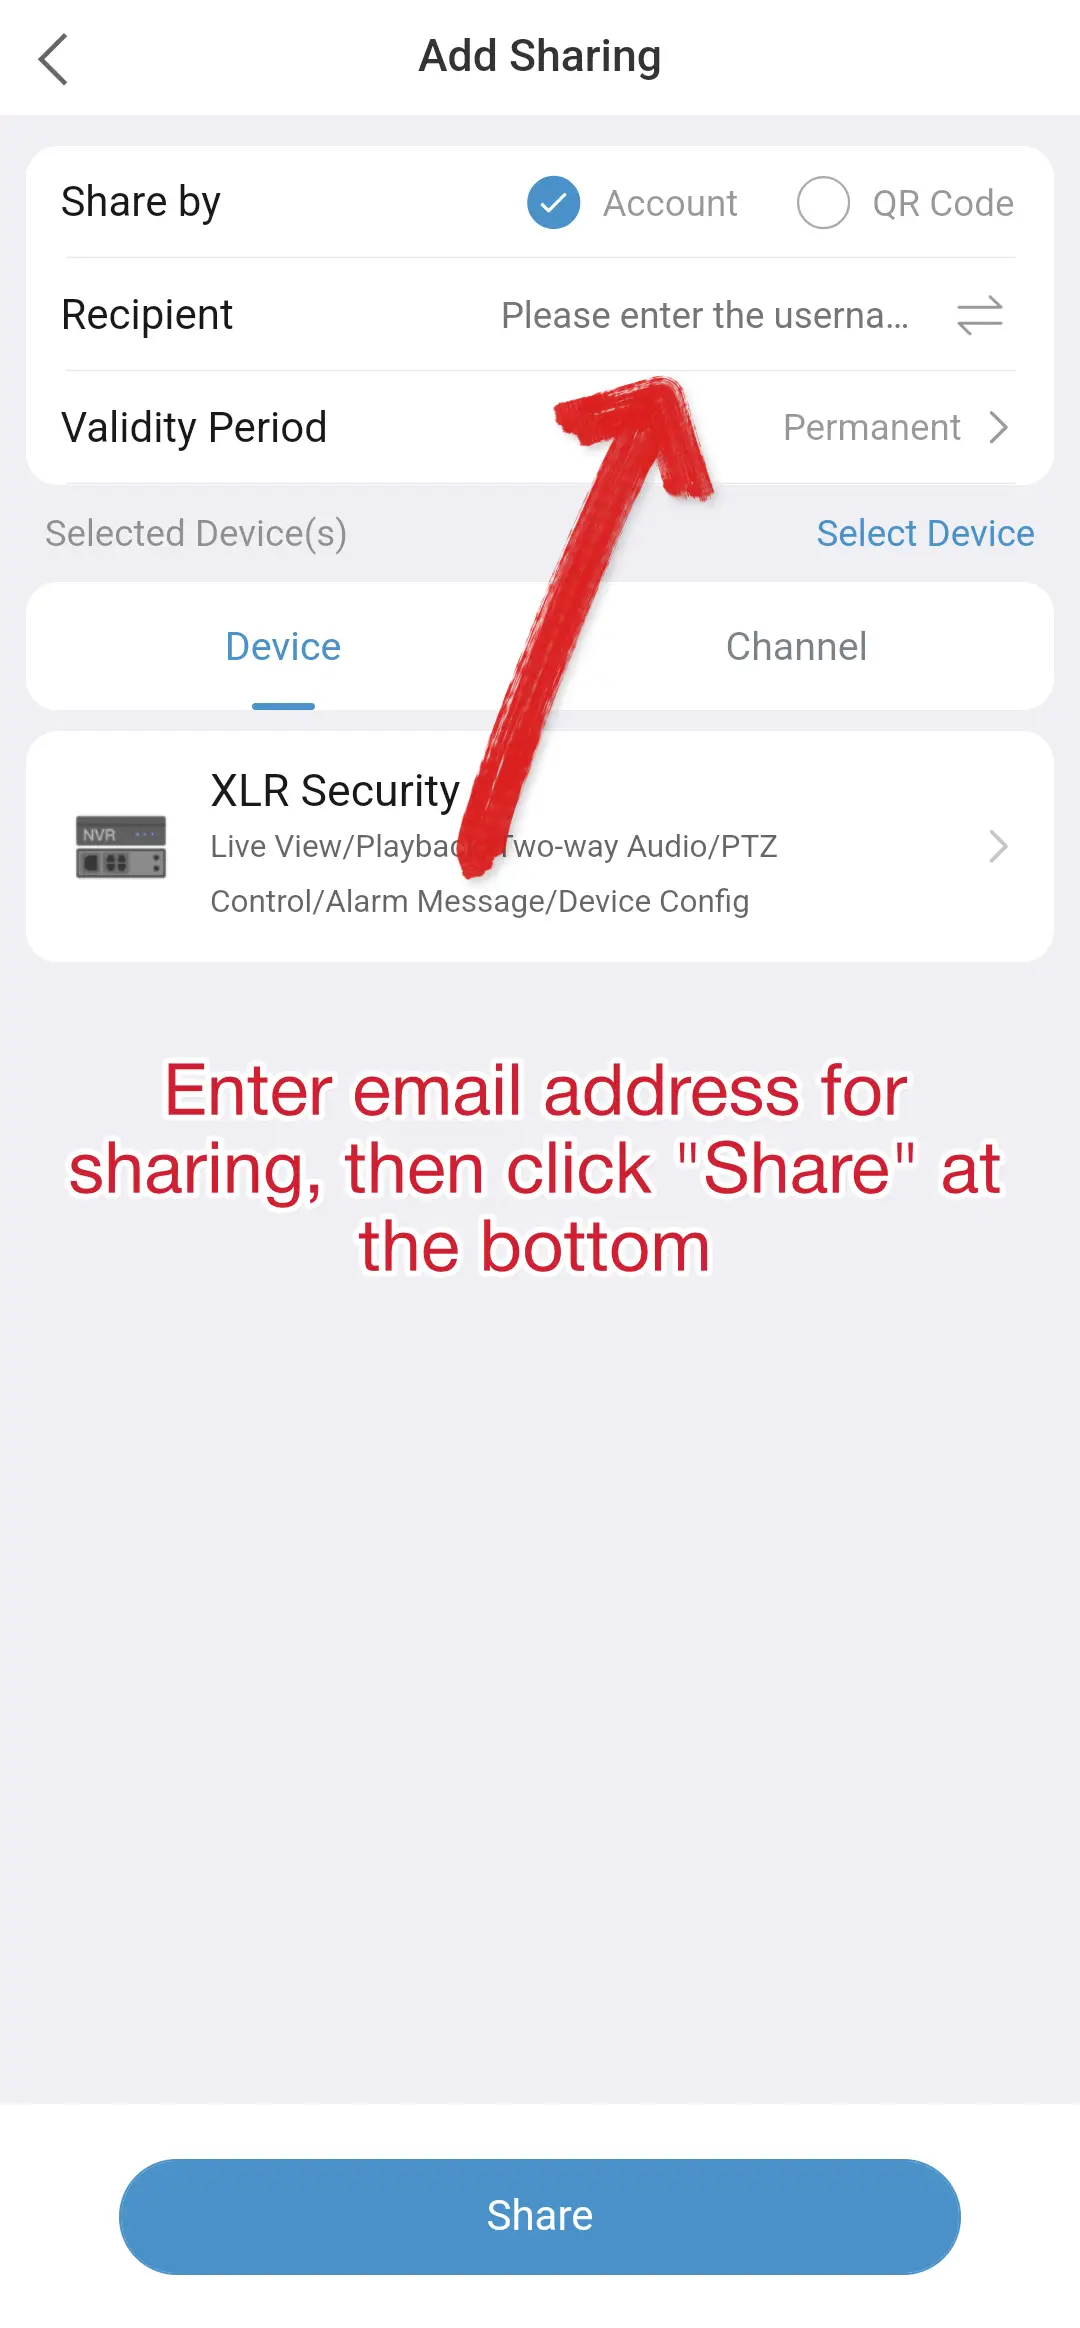
In the sharing page, type the user’s email address in the Recipient box. You can toggle between Email and Phone Number by tapping the two arrows on the right side.
After you’ve entered their email or phone number into the box, tap the blue Share button at the bottom. Once the sharing is complete, they should immediately have access to the cameras on their app.
Advanced Sharing Functions
The UNV-Link app allows you to perform a variety of advanced sharing functions. For example, if you have multiple cameras on an NVR, you can choose which specific cameras to share.
You can also share your cameras by generating a QR code. This is helpful if the person you’re sharing with has yet to register for an account on the app.
Share individual cameras
To share specific cameras, navigate to the sharing menu by tapping the three dots ⋮ icons beside your NVR and tap on Select Device. From this page, you can select between sharing devices – which includes an NVR and all cameras associated with it – or share specific channels.
To share only a few cameras, first uncheck the device that’s currently selected – then navigate to the Select Channel tab at the top right.
Use the arrows on the left to expand your NVR and see a list of all channels added to it. Now, select which channels you want to share with the other person and click Next at the upper right corner.
Finally, enter the email address of the user you’d like to share these devices with and click Share at the bottom.
When they open the app on their phone, they’ll only see the channels that have been shared with them. They won’t see any blank channels either – they will be totally unaware that any cameras are missing from the list.
Share via QR code
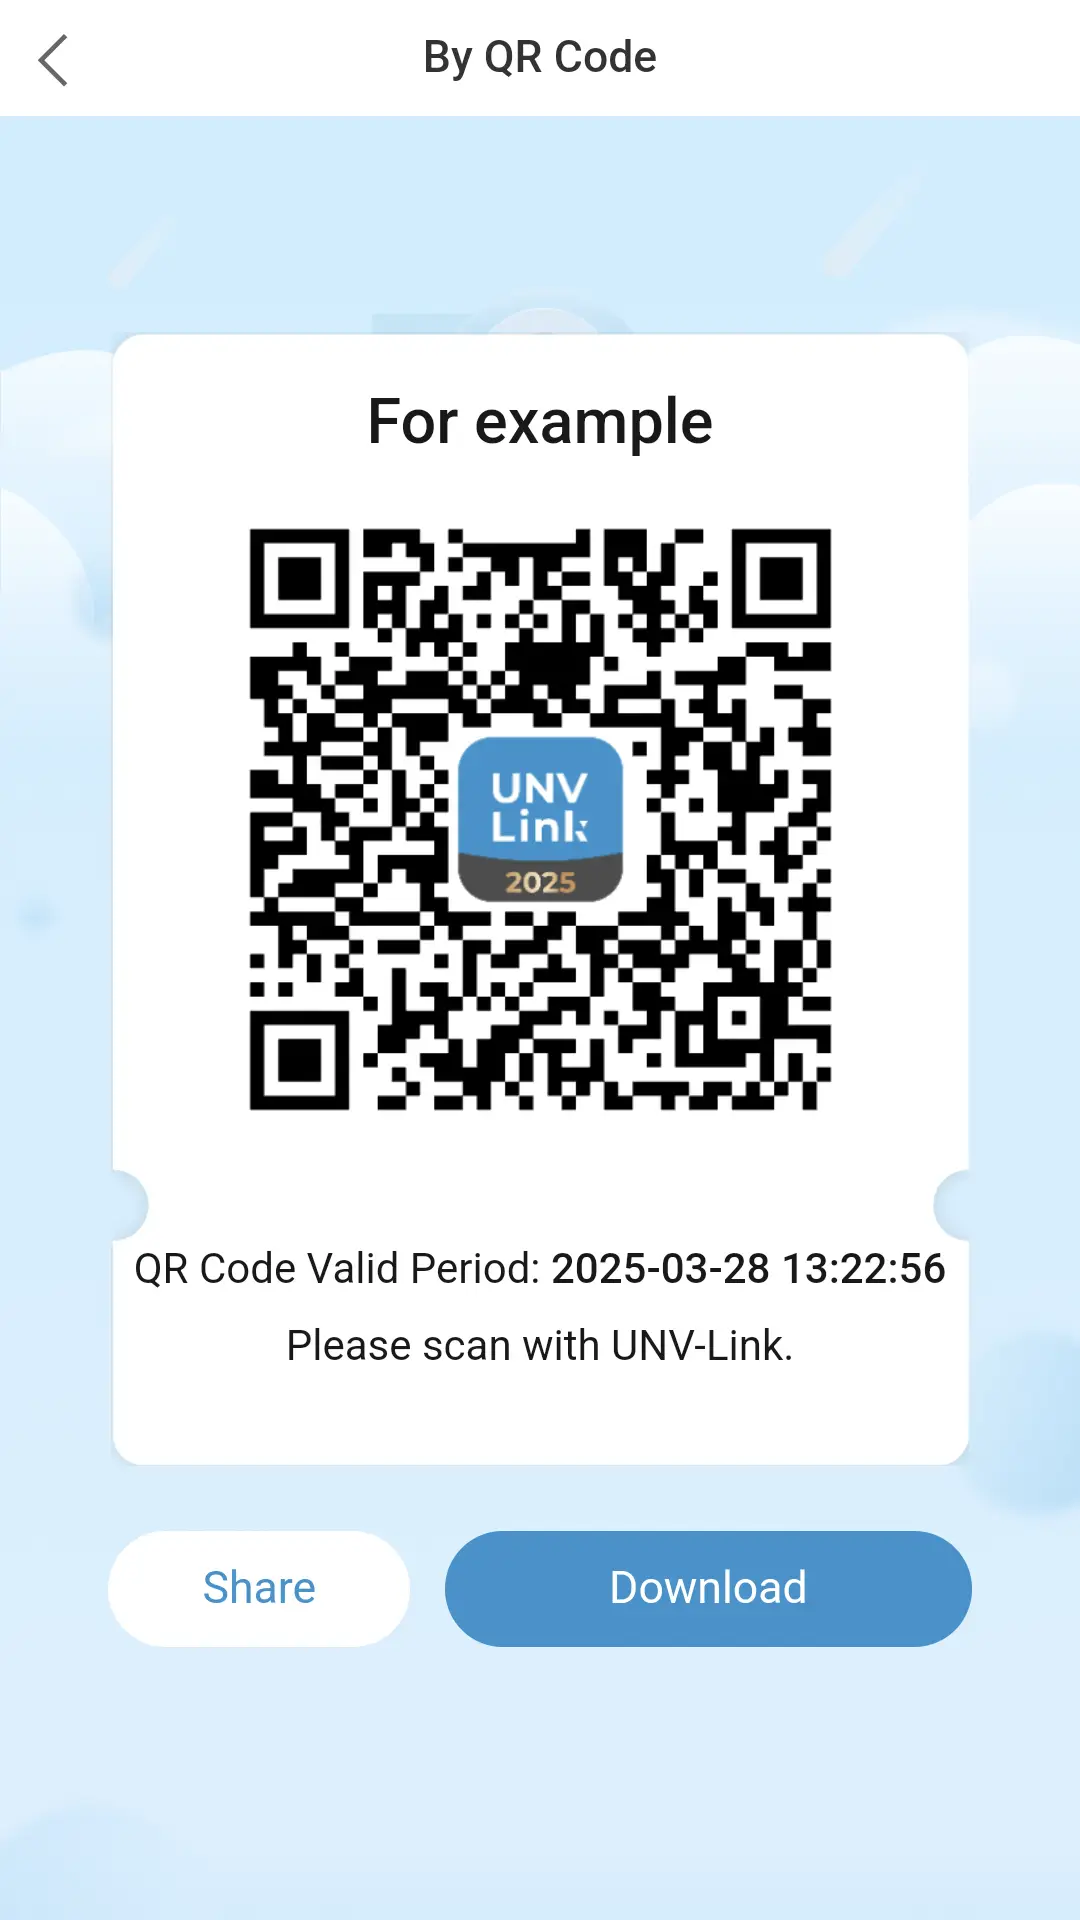
You can also share your devices by generating a QR code and letting the other person scan it with the UNV-Link app. You can switch to this method by tapping on QR Code at the top of the sharing menu.
Then, choose a name for the QR code – a label for your own reference – and tap Share. A QR code will be generated – make sure to take a screenshot or use the Download button to save a copy in your phone’s camera roll.
Optionally, you can set a custom expiry for the QR code (default 7 days) or create a verification code that must be entered along with the QR code in order to add the device.
Sharing Permissions (Live View, Playback, PTZ Control, etc.)
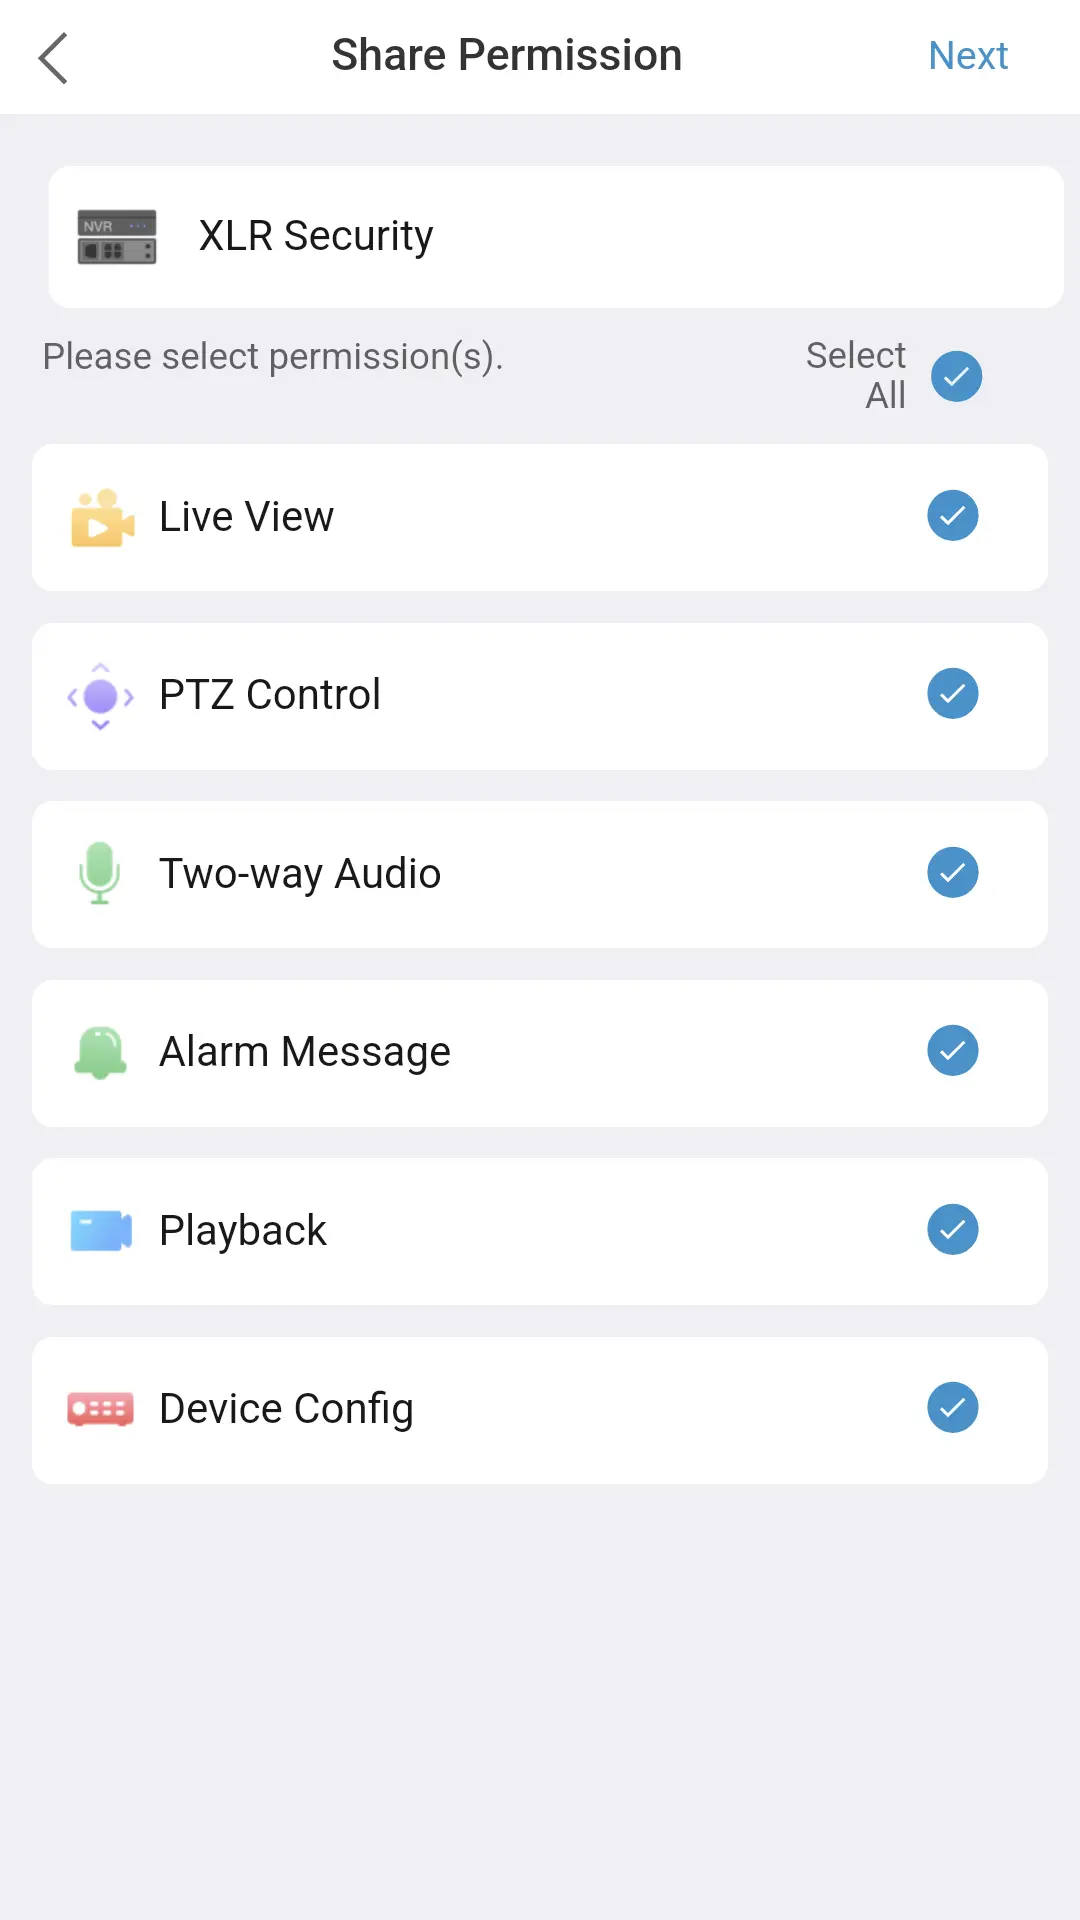
Within the UNV-Link app, you can also manage the sharing permissions for the other user. You can restrict their access to the following permissions:
- Live View
- PTZ Control
- Two-way Audio
- Alarm Message
- Playback
- Device Configuration
You can access sharing permissions by tapping on the device icon in the middle of the sharing menu. This will bring you to the sharing permissions page, where you can tap on individual functions to deselect them and restrict access.
Sharing Management – View shared users
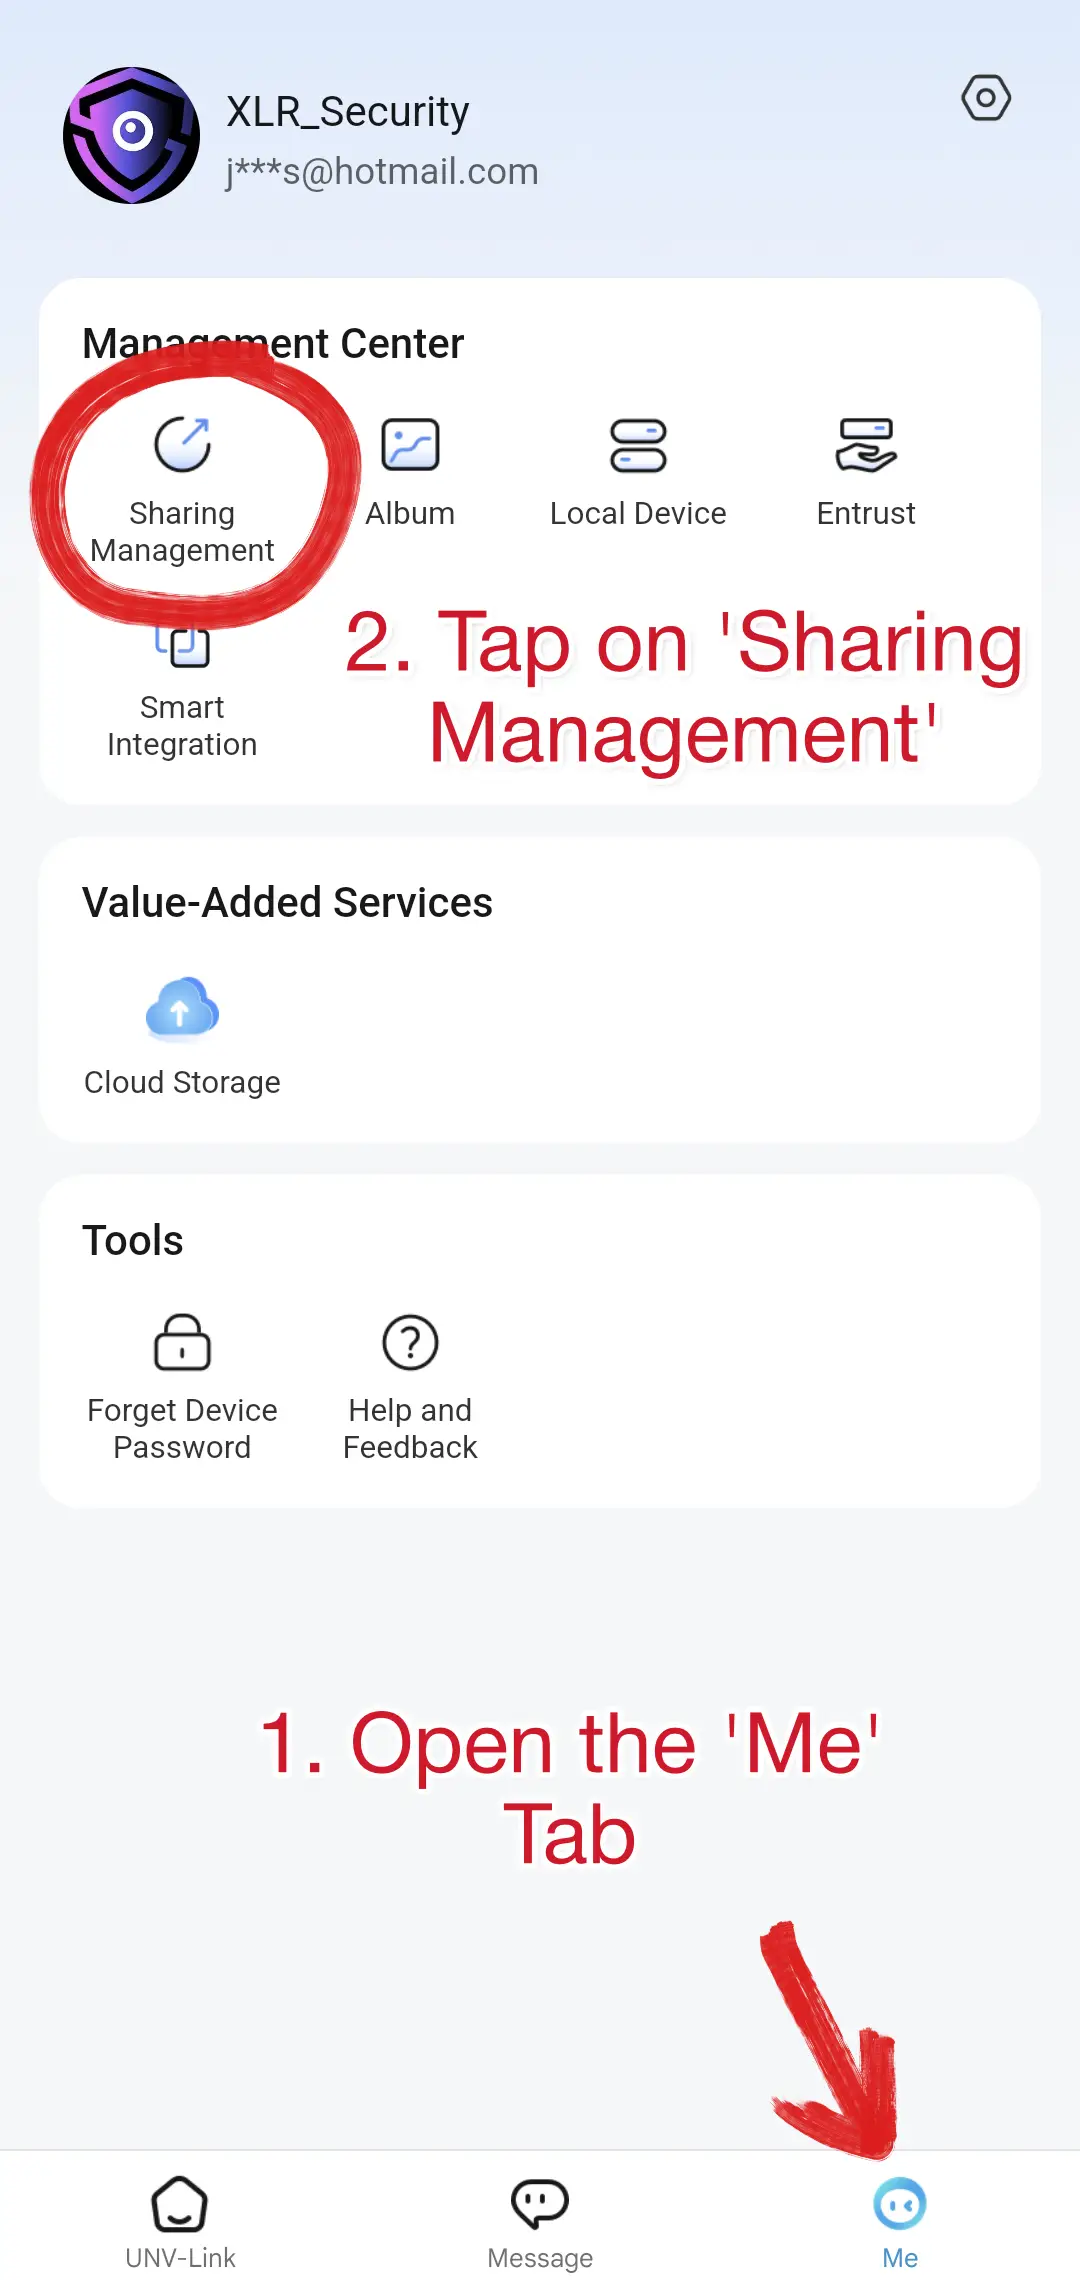
The sharing management page allows you to view all the users who you’re currently sharing with. You can access this page by navigating to Me at the bottom right, and clicking on Sharing Management.
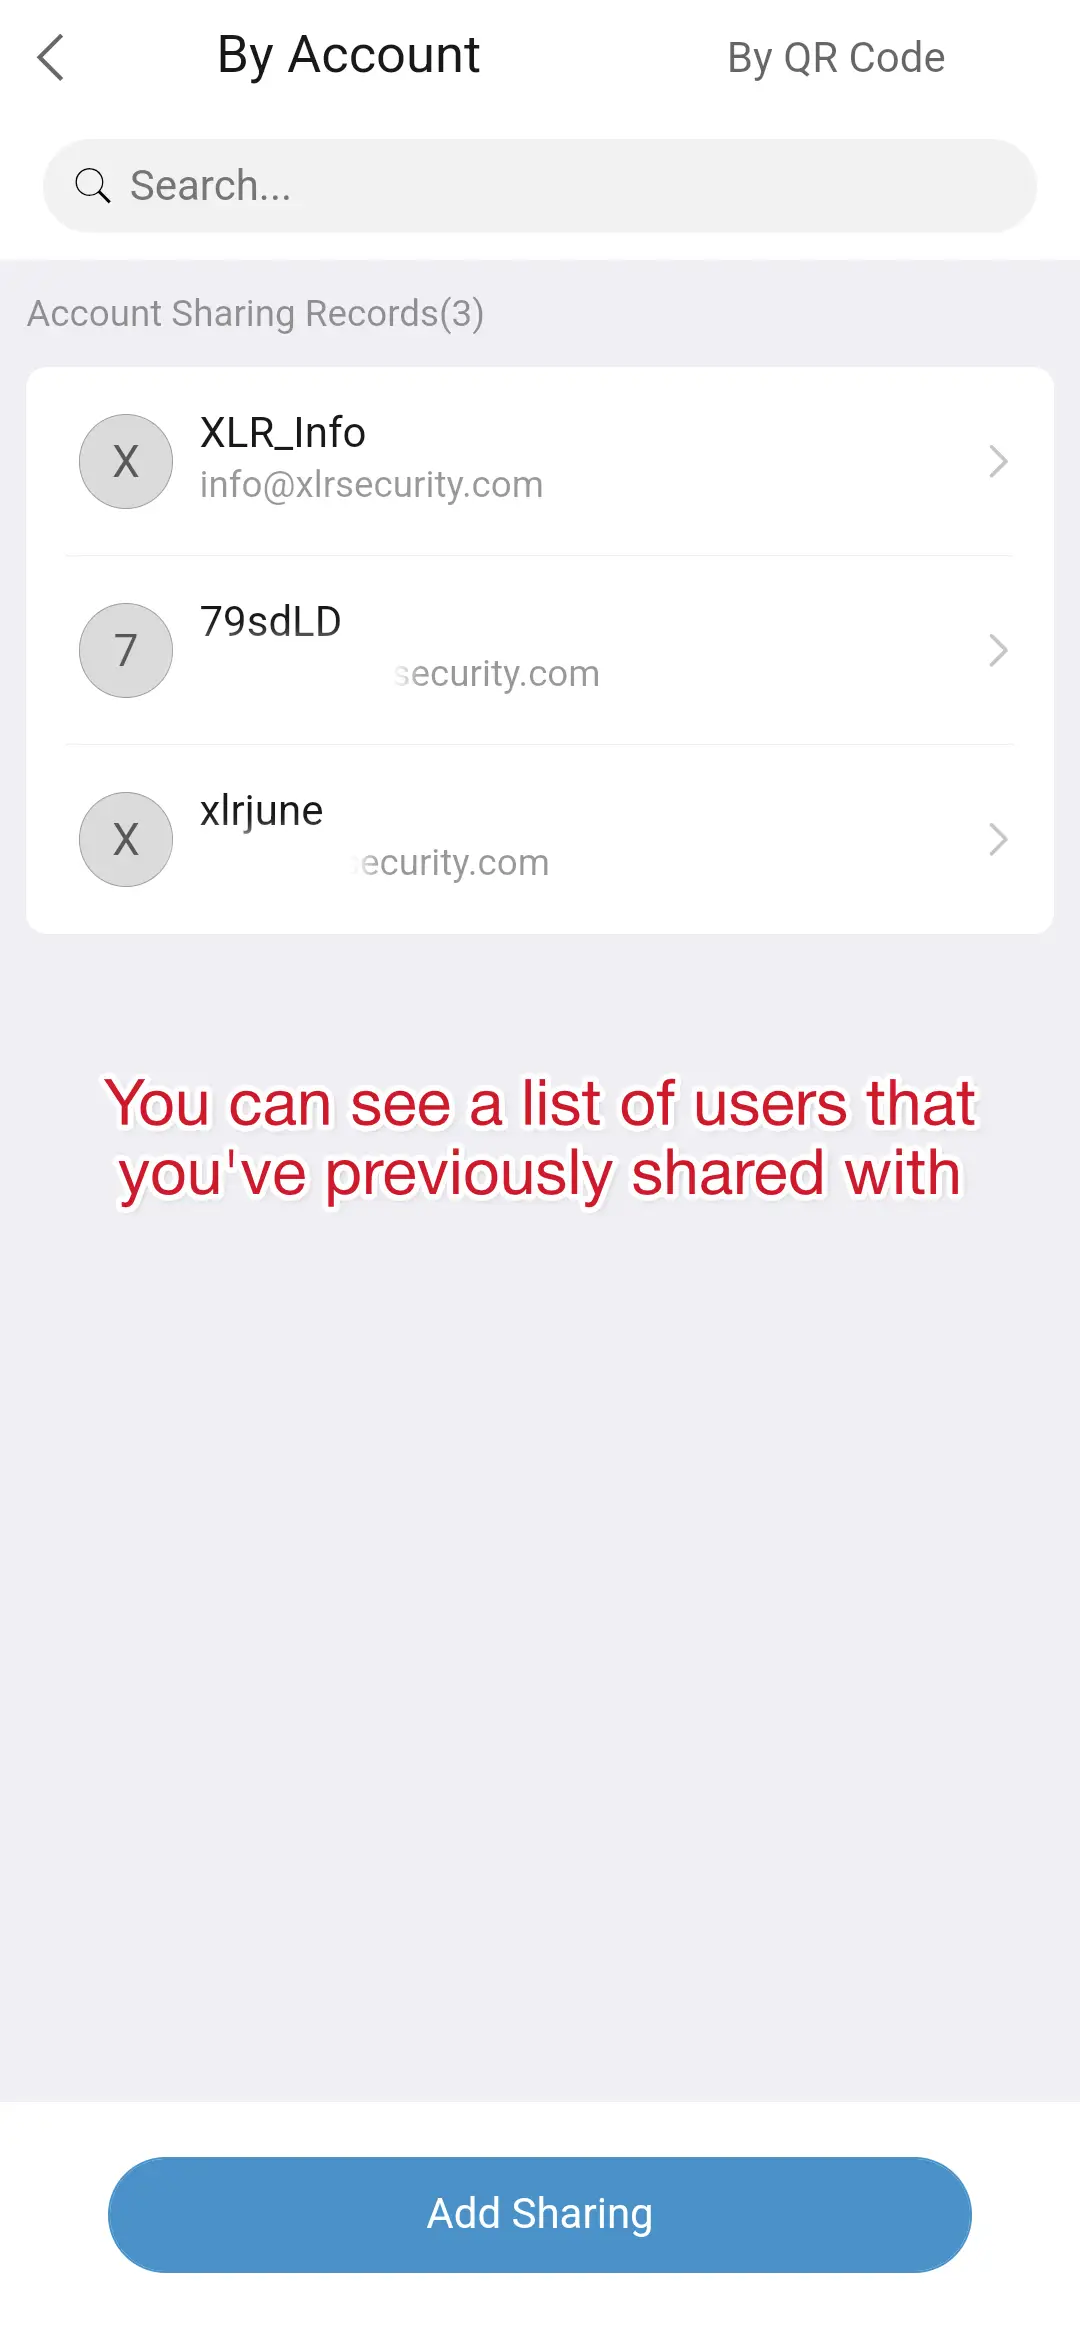
In the sharing management page, you’ll see a list of all the users that you’ve previously shared your cameras with.
Tap on a user in the list to edit their permissions, assign or remove devices from their account, or stop sharing completely.
You can view a list of QR codes that you’ve previously generated by tapping on By QR Code at the upper right corner. This is helpful if you already generated a code but forgot to take a snapshot earlier.
You can also share with new users from this menu by tapping on Add Sharing at the bottom. Then, enter their email address into the recipient box and select which devices you want them to have access to.
Final Thoughts
The UNV-Link app has a robust interface for sharing your cameras with other users, managing their permissions, and even sharing specific channels.
You can download the latest version of UNV-Link from the Google Play Store or iOS app store – just search for “UNV-Link” and you’ll find it there.
Thanks for reading – I hope you were able to get everything working!
