You can set the time on your Uniview NVR in two ways:
- Via the NVR connected to a monitor (local monitor)
- Via a computer connected to the network (web interface)
How to set the time directly on the recorder
Watch the YouTube video below to learn How to Adjust the Time on your Uniview NVR (via local monitor).
If you’re logging into the NVR from a laptop or computer, keep scrolling down for further instructions.
How to set the time via the web interface (laptop or computer)
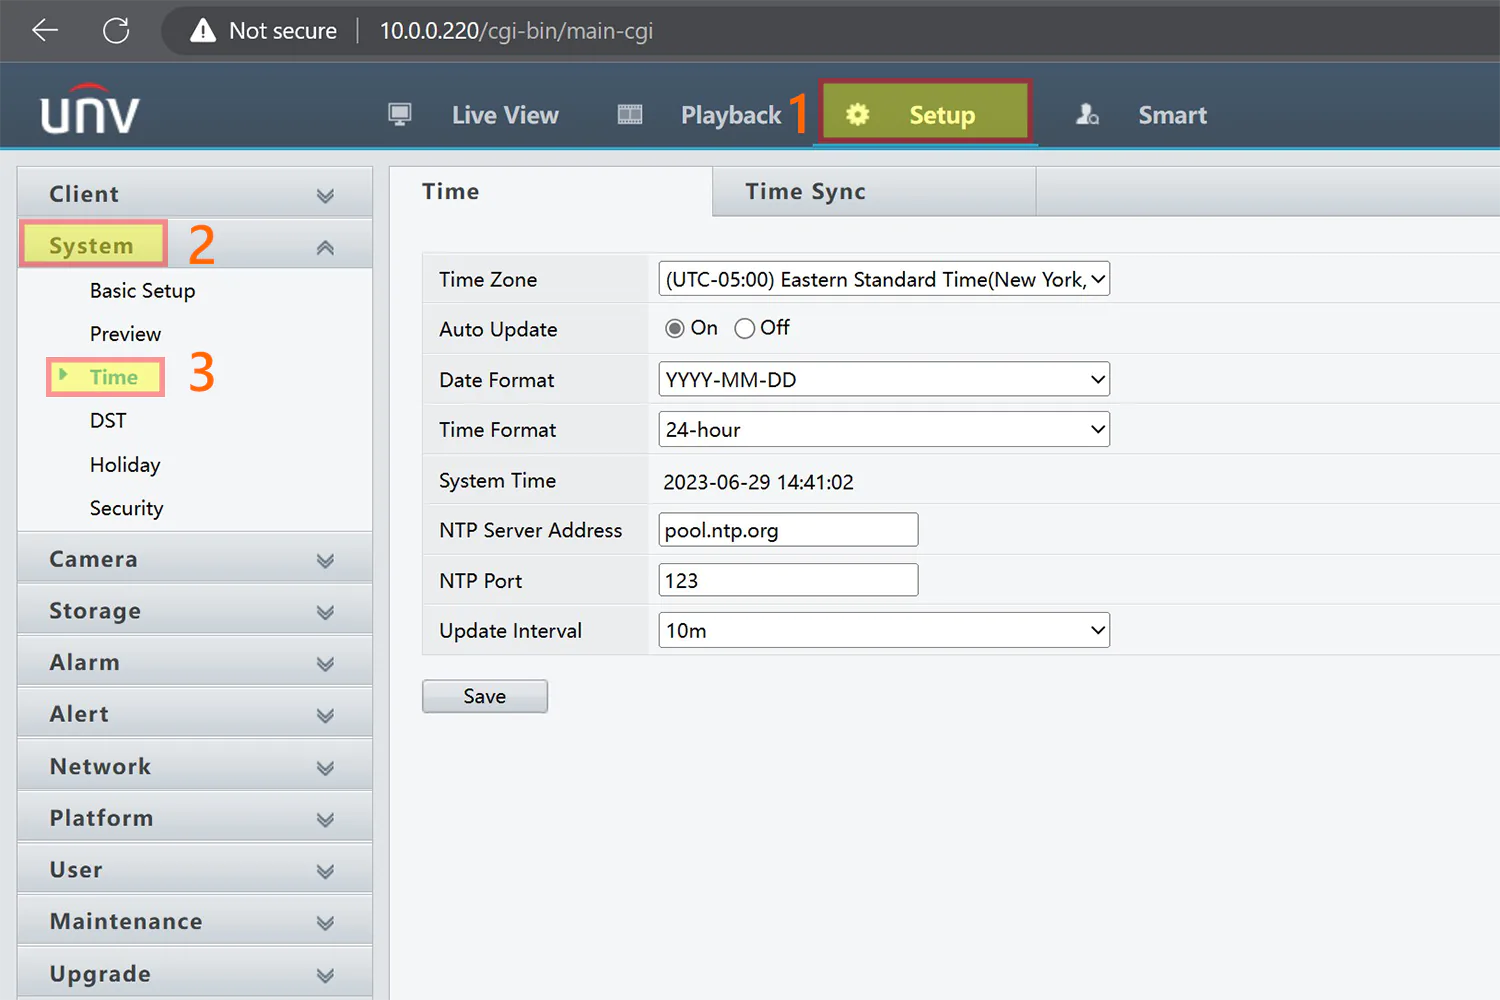
First, you’ll need to login to your NVR by typing the IP address into your web browser. After you’ve logged into your NVR, navigate to Setup -> System -> Time.

- Start by setting the proper Time Zone; for example I’ve set it to -05:00 EST because we are in Toronto. After selecting your time zone, click save.
- Set Auto Update to ON. This allows your NVR to sync its internal time with the internet, which ensures the time does not drift.
- Set the NTP Server Address to pool.ntp.org. This is a free, public time server that your NVR will ping every 10 minutes to get the proper time. After setting this server address, click Save to finalize the settings.
Daylight Savings Time (DST)
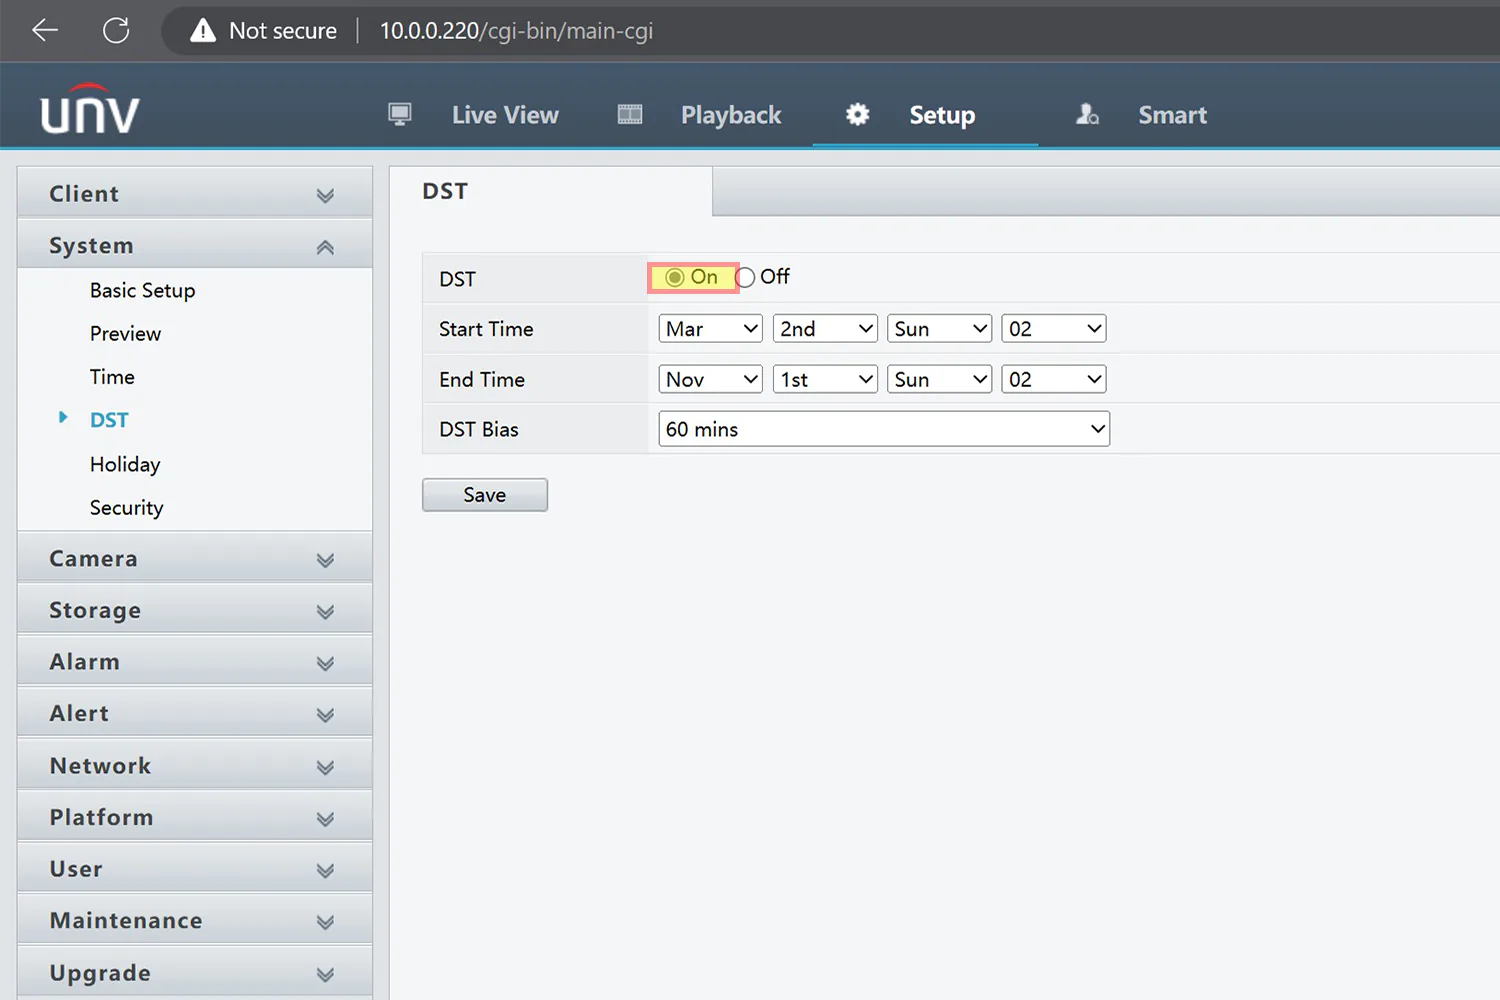
You’ll also need to enable the DST setting if you live in a place that observes daylight savings time. Otherwise, you may notice the time is off by 1 hour during half of the year.
To enable daylight savings time on a Uniview NVR, navigate to Setup -> System -> DST. Turn the DST setting to ON, and choose the proper start & end date for daylight savings in your area.

Final Thoughts
Setting the time on your NVR is very important because you may need to present the video as evidence if something happens in front of your cameras.
If you followed this tutorial correctly, the time on your NVR will be properly synced as long as you maintain an internet connection on the recorder.


